4730 Kenny Rd. Columbus OH 43220

[email protected]
Toprated
Hero badge acc business
Hero badges google

>570 reviews

Hero badges thumbstack

61 reviews

Andersen Certified Contractor

Tools to Help with Minor Window Repairs

Tools to Help with Minor Window Repairs

Windows are not just panes in a frame; they’re vital components of your home. Not only do they let in light and fresh air, but they also contribute to your home’s safety. However, even the highest-quality windows can eventually need some minor repairs: a cracked pane, squeaky sashes, or cold drafts sneaking through gaps. The good news is that you don’t always need to call a professional. With the right tools and a bit of patience, you can handle most minor window repairs yourself. In this article, we’ll cover the essential tools and techniques to help you restore your windows to their prime.

Why Minor Window Repairs Matter

Don’t underestimate the importance of minor window repairs. Small cracks, gaps, or damage can not only ruin the aesthetic of your windows but also lead to bigger issues if ignored. For example, a cracked pane or a sticking lock isn’t just an eyesore—it can compromise the safety of your home. The sooner you tackle these repairs, the less likely they are to escalate into more significant problems.

By fixing a window right away, you can prevent issues like higher energy bills, water leaks, or even pest infiltration. Plus, many of these repairs are simple and can be done by yourself, saving you both time and money.

Why Minor Repairs Are Crucial:
  • Energy Efficiency: Sealing windows tight keeps the warmth in and the cold out.
  • Safety: Well-maintained locks and sturdy windows contribute to the overall security of your home.
  • Curb Appeal: A little repair goes a long way in enhancing the look of your home.
  • Prevent Bigger Problems: It’s easier (and cheaper) to fix small issues before they become major headaches.

The must have toolkit for every homeowner

The Must-Have Toolkit for Every Homeowner

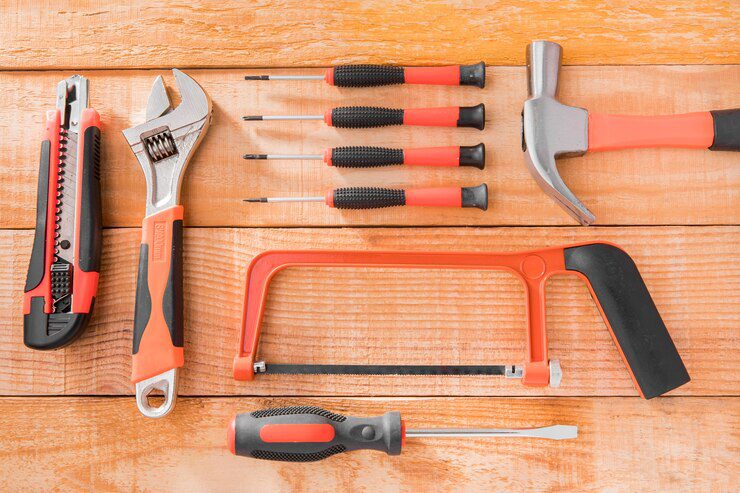
You don’t need to be a professional handyman to repair your windows, but having the right tools makes the job much easier. Here’s a list of essential items that should always be within reach when performing minor window repairs.

  • Screwdrivers (Flathead & Phillips): Essential for working with screws and fasteners on sashes and locks.
  • Utility Knife: Perfect for removing old caulk or paint from window frames without causing damage.
  • Pliers: Handy for removing small parts or loosening stuck components.
  • Tape Measure: Accuracy is key, so measure precisely when replacing glass or installing weatherstripping.
  • Rubber Mallet: Ideal for gently tapping in glass panes without breaking them.
  • Putty Knife: Used for applying caulk or glazing putty neatly.

This basic toolkit is inexpensive and will cover most window repair needs without breaking the bank.

Essential Tools for Window Repairs:

  • Screwdrivers: For working with screws and fasteners.
  • Utility Knife: For removing old materials like caulk or paint.
  • Pliers: For small, detailed work.
  • Tape Measure: To measure for replacements or adjustments.
  • Rubber Mallet: To install glass without damaging it.
  • Putty Knife: For caulk or glazing putty application.

How to Fix a Cracked Window Pane

Cracks in windows are a common issue, and while replacing the entire window might seem like the only option, in many cases, you can simply replace the damaged pane. With a few basic tools and a step-by-step approach, you’ll have your window looking good as new.

Step-by-Step Guide for Replacing a Cracked Window Pane:

  1. Remove the Broken Glass: Carefully take out the broken pieces of glass. Use gloves and safety goggles for protection.
  2. Clean the Frame: Clean the window frame thoroughly to remove any debris, old caulk, or dust.
  3. Measure and Cut the New Glass: Measure the exact dimensions of the opening and either order a pre-cut pane or have it cut at a local store.
  4. Install the New Glass: Place the new glass pane into the frame and secure it using glazing points.
  5. Apply New Caulk: Using a putty knife, smooth a fresh layer of glazing putty around the edges to ensure a tight seal.

If the crack is minor, there are also glass repair kits available that can fill the crack and restore the window’s functionality.

Tools for Cracked Glass Repair:
  • Glazing Points: These hold the new glass securely in place.
  • Putty Knife: For smoothing out the glazing putty.
  • Replacement Glass: Ensure the new glass fits precisely.

Tools for Sealing Gaps and Preventing Drafts

Tools for Sealing Gaps and Preventing Drafts

Drafty windows are not only annoying but can also lead to higher energy costs. Sealing those gaps will help keep the temperature inside your home comfortable and lower your heating and cooling bills.

To seal windows and keep the cold air out, you’ll need a few specialized tools.

How to Seal Window Gaps:

  1. Clean the Surface: Before applying caulk or weatherstripping, ensure the window frame is clean and free of debris.
  2. Apply Caulk: Use a caulking gun to apply a continuous bead of caulk along the edges of the window.
  3. Smooth It Out: Use your finger or a putty knife to smooth the caulk, ensuring there are no gaps.
  4. Let It Dry: Allow the caulk to dry fully before closing the window or exposing it to rain.

Sealing your windows not only prevents drafts but can also improve soundproofing and block out moisture.

Tools for Sealing Gaps:

  • Caulking Gun: For precise application of sealant.
  • Caulk: Choose a high-quality, weather-resistant sealant.
  • Putty Knife or Finger: To smooth out the caulk and make a clean finish.

Repairing Window Sills and Frames with Ease

If your window sills or frames are damaged, don’t rush to replace them. Many times, a simple repair can restore them to their original condition, giving your window a fresh look.

How to Repair Window Sills:

  1. Remove the Damaged Sill: Use a crowbar or similar tool to carefully lift out the damaged sill.
  2. Measure and Cut the New Sill: Measure the old sill and cut a replacement to fit exactly.
  3. Install the New Sill: Secure the new sill into place using screws or nails. If it’s wooden, you may want to sand and paint it before installation.

This is a great way to improve the overall look of your window while prolonging its life.

Tools for Window Sill Repair:
  • Screwdriver or Hammer: For securing the new sill.
  • Tape Measure: For accurate measurements.
  • Paint or Stain: To finish the new sill and protect it from the elements.

Fixing Broken Locks and Latches: Tools and Techniques

Fixing Broken Locks and Latches: Tools and Techniques

If your window lock is broken or malfunctioning, it’s crucial to address the issue right away. A faulty lock can compromise your home’s security, and fixing it is usually quite simple with the right tools.

How to Fix a Window Lock:

  1. Assess the Damage: Check the lock for any visible issues, such as a jammed mechanism or missing parts.
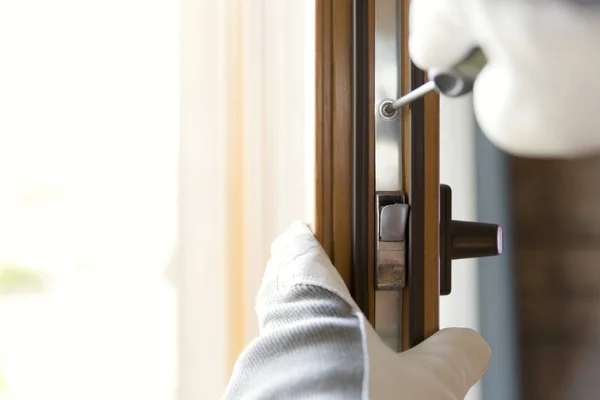
  2. Remove the Old Lock: Use a screwdriver to remove the lock from the window frame.
  3. Install the New Lock: Secure the new lock with screws. Be sure the new lock fits properly.
  4. Lubricate the Lock: Apply a lubricant to ensure the lock mechanism operates smoothly.

Also, consider using a silicone-based lubricant if the lock is stiff or squeaky.

Tools for Lock Repair:

  • Screwdriver: For removing and installing the lock.
  • Lubricant: To keep the lock functioning smoothly.
  • Replacement Lock: Ensure it matches the existing lock type and size.

Window Caulking: Tools for a Professional Finish

Caulking is one of the most effective ways to improve your windows’ energy efficiency and prevent drafts. To get the job done right, you’ll need the proper tools and techniques.

Caulking Window Frames:

  1. Clean the Surface: Before you start, remove any old caulk or paint from the frame. Use a utility knife to scrape off old material.
  2. Apply the Caulk: Insert the caulking tube into the gun and apply an even bead of caulk along the edge of the window frame.
  3. Smooth It Out: Wet your finger or use a putty knife to smooth the caulk and ensure there are no gaps.

Pro tip: Apply the caulk on a dry day, as caulking in humid or wet conditions can affect its adhesion and drying time.

Tools for Professional Caulking:

  • Caulking Gun: For precision application.
  • Caulk: Choose a high-quality, weather-resistant option.
  • Putty Knife or Wet Finger: For smoothing the caulk.

Tool Maintenance for Long-Term Window Repair Success

Now that you’ve tackled your window repairs, it’s time to think about maintaining your tools. Keeping your tools in good shape ensures they’re ready to go whenever you need them.

Tool Care Tips:

  • Keep Tools Clean: After each use, wipe down your tools to prevent rust or build-up.
  • Sharpen Blades Regularly: Utility knives, scrapers, and other blades should be sharpened for efficient use.
  • Store Tools Properly: Keep your tools in a dry, organized space to avoid damage or loss.

By maintaining your tools, you’ll be prepared for your next window repair job and ensure the longevity of your tools.

Tool Maintenance Essentials:

  • Clean and Dry: Wipe your tools after each use.
  • Sharpen Tools: Keep blades and edges in top condition.
  • Proper Storage: Store your tools in a dry, organized space.

Common Mistakes to Avoid When Using Window Repair Tools

Common Mistakes to Avoid When Using Window Repair Tools

While window repair is a straightforward task, it’s easy to make mistakes. Here are a few common errors to avoid.

Mistakes to Watch Out For:

  • Using Too Much Caulk: Apply just enough caulk to seal the gaps; over-applying can lead to a messy finish.
  • Ignoring Safety Gear: Always wear gloves and goggles when handling glass.
  • Skipping Measurements: Accurate measurements are key to a successful repair.

How to Know When It’s Time to Call a Professional

While many window repairs can be handled on your own, some issues may require professional expertise. Here are signs that it’s time to call in the pros:

  • Severe Glass Damage: If the glass is shattered or significantly cracked, it’s safer to let a professional handle the replacement.
  • Complex Lock or Frame Problems: If the lock is beyond repair or the frame is severely warped, a professional might be needed to avoid further damage.

Professional help may cost more, but it’s worth it for certain repairs.

When to Call a Professional:

  • Severe Glass Damage: Large cracks or shattered panes should be addressed by a pro.
  • Complicated Lock or Frame Issues: If repairs seem too complicated, it’s best to consult an expert.
Need a Window Repair Services?

Contact us now for a free estimate and take the first step toward repairing your windows!

You May Also Be Interested In:

+

Request a call

Please leave your contact details.
The manager will contact you shortly.