When it comes to replacing or installing new windows, the big question isn’t just what kind of windows to buy—it’s also about how you’re going to install them. Do you channel your inner DIY enthusiast and tackle the job yourself? Or do you hand it off to the pros who do this day in and day out? It’s a classic dilemma, kind of like deciding whether to cook a fancy dinner or just order takeout. Both have their pros and cons, and the right answer depends on your skills, time, and budget. Let’s dive in and break it all down.
Key Takeaways
- Hire pros for full window replacements. $200–$400 savings on labor doesn’t justify $2,000–$10,000 water damage risk if flashing fails.
- DIY OK for: storm windows, single-pane glass swap, sash kit replacements. NOT for: full window units, large openings, complex flashing, second-story.
- Realistic DIY savings: $1,000–$3,000 across a 12-window home (not the gross labor figure once you factor tools, time, voided warranty, risk).
- Warranty: DIY voids coverage on most major brands (Andersen, Pella, Marvin). 20-yr glass warranty is worth $1,500–$3,000 over window’s life.
- Time estimates: Pro 1–2 hr per replacement, 2–4 hr per full-frame. DIY 4× slower. Whole-home pro: 1–3 days replacement, 4–7 days full-frame.
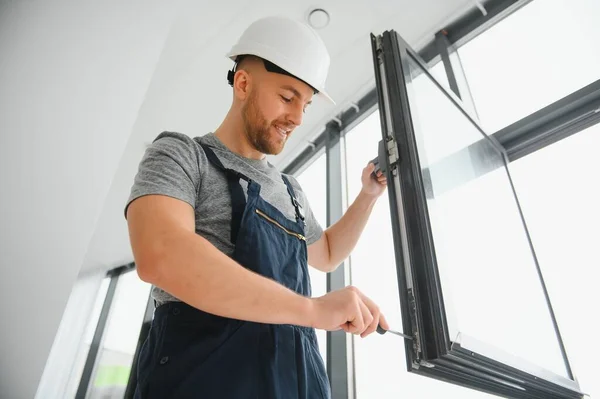
Understanding the Importance of Proper Window Installation
Secure placement ensures your windows are weather-tight, durable, and functional. Beyond aesthetics, an accurate setup keeps drafts and moisture out, cuts down energy bills, and helps maintain the structural integrity of your home. Skimping on this step is a shortcut to bigger problems, including mold, warped walls, or skyrocketing heating costs.
Self-Installation vs. Expert Services: A Comparison
Self-led installation puts you in control and can save money. If you’re confident in your abilities and enjoy tackling home improvement tasks, it’s a great way to build your skills. On the other hand, professional services come with the assurance of expertise, speed, and warranties—perfect for those who prefer to avoid the trial-and-error phase.
The Benefits of Installing Windows on Your Own
Some key advantages include:
- Saving money: You’ll dodge labor fees, keeping more cash in your pocket.
- Flexibility: Work on your own schedule without worrying about coordinating with professionals.
- Skill-building: Master tools and techniques that can come in handy for future repairs or upgrades.
The Pitfalls of DIY Window Installation
Another big hurdle? Weatherproofing. If you don’t properly seal your windows, you could be inviting water damage, mold, and energy loss into your home. And then there’s the time factor—what might seem like a weekend project could easily drag on for weeks if you run into snags.
Common pitfalls and how to avoid them:
- Incorrect measurements: Double-check every measurement to avoid ill-fitting windows.
- Skipping the sealant step: Use high-quality caulking to keep moisture out.
- Rushing the process: Take your time to ensure everything is level and secure.
If you’re working with older wooden frames that you’d rather preserve than replace, investing in wood window repair is often the smartest way to maintain character and efficiency without starting from scratch.
Why Professional Installation Might Be Worth the Investment
One of the biggest benefits is the warranty. Most professional installations come with a guarantee, so if something goes wrong, you’re not stuck footing the bill. And let’s face it—time is money. What might take you days (or weeks) can usually be done in a matter of hours by a pro.
Key reasons to go pro:
- Expertise: They know what they’re doing, and they do it quickly.
- Warranty: Peace of mind if something goes wrong.
- Efficiency: No second-guessing or redoing mistakes.
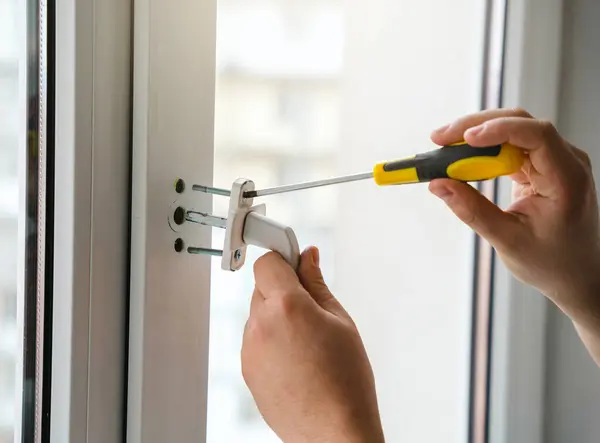
Tools and Skills You’ll Need for DIY
Equally important is understanding the process. Watch tutorials, read guides, and—if possible—consult an expert before starting. DIY window installation is definitely a learn-as-you-go experience, but the more prepared you are, the better.
Essential items for success:
- Measuring tape and level: For accurate alignment.
- Shims and screws: To hold everything in place.
- Caulking and sealant: For airtight protection.
- Power tools: To tackle tricky adjustments.
The Role of Warranty in DIY versus Professional Installation
On the other hand, when you hire a professional, you often get two warranties: one for the product and another for the labor. This means if anything goes south, you’re covered. It’s like having insurance for your peace of mind. Plus, professionals have to adhere to industry standards, so the chances of something going wrong in the first place are slim.
Here’s how warranties stack up:
- DIY: Product-only warranty (if you follow every rule).
- Professional: Product + labor warranty, covering mistakes and defects.
If long-term security is important to you, that extra layer of coverage might just tip the scales in favor of hiring a pro.
The Impact of Installation Quality on Window Lifespan and Energy Efficiency
Poor installation can lead to drafts, leaks, and even premature wear and tear. Over time, these issues can snowball into higher energy bills, mold problems, and the need to replace your windows far sooner than you’d planned. On the flip side, a proper installation ensures that your windows function as they should—keeping your home cozy in winter, cool in summer, and free of annoying noises from the outside world.
Here’s why quality matters:
- Energy efficiency: Tight seals prevent air leaks, reducing your energy bills.
- Durability: Properly installed windows last longer, saving you money on replacements.
- Comfort: No drafts or condensation ruining your cozy space.
Common Mistakes in DIY Window Installation and How to Avoid Them
Another big mistake is skipping the weatherproofing step. Caulking might not seem glamorous, but it’s essential for keeping moisture out. Forget this step, and you could be inviting mold and rot into your walls faster than you can say “oops.” Finally, not using shims or failing to level the window can lead to misalignment, making it hard to open and close—or even causing the glass to crack under pressure.
Avoid these pitfalls by:
- Double-checking measurements before ordering your windows.
- Following manufacturer guidelines to the letter.
- Investing in high-quality sealants to weatherproof your windows.
The Time Factor in DIY versus Professional Installation
Professionals, on the other hand, can often get the job done in a day or two. They’ve got the experience, tools, and manpower to work efficiently. This means less disruption to your life and fewer weekends spent with a caulking gun in hand. If time is tight, hiring a pro might be your best bet.
Here’s how the time commitment breaks down:
- DIY: Several days to weeks, depending on your skill level.
- Professional: 1–2 days for most standard installations.
Final Thoughts: What’s Right for You?
Before deciding, ask yourself:
- Do I have the tools and skills required for this task?
- Can I afford the time needed to do the job right?
- Is saving money worth the potential risk of mistakes?
Frequently Asked Questions
Quick answers to common reader questions, drawn directly from real search intents.
Hire a pro for full window replacements — failed installations cause water damage that costs $2,000–$10,000 to remediate, far exceeding the $200–$400 labor savings. DIY is realistic for: storm windows, single-pane glass replacement in existing sashes, and like-for-like sash kit swaps. Pro work is essential for: full window units, cut-in installations, replacements >24 sq ft, anywhere flashing or weather-tight integration matters. The break-even: if labor is under $300/window AND you can secure proper flashing, DIY can save money.
DIY pros: $200–$400 savings per window, immediate scheduling, learning experience. DIY cons: warranty voided on most major brands, water damage risk if flashing fails, slower (4–6 hr/window vs pro’s 1–2 hr), heavy lifting risk, no recourse if it leaks. Pro pros: warranty protection, code compliance, weather-tight integration, fast install, insurance coverage during work. Pro cons: $200–$500 labor per window, scheduling delay 2–6 weeks during peak season.
Per-window labor savings: $200–$500 for replacement (existing frame), $400–$700 for full-frame install. On a 12-window home: $2,400–$6,000 in potential savings. But factor in: tool purchases ($150–$400 if you don’t have them), 4–6× the time of a pro install, voided warranties (typically 30–50% of total window cost), and water damage risk. Honest math: real savings are usually $1,000–$3,000 across a project, not the gross labor figure.
Essential: 4-foot level, hammer, utility knife, putty knife, caulk gun, drill with bits, tape measure, square. Specialized: shims (cedar wood, ~$15/pack), low-expansion foam (NOT high-expansion — that bows frames), exterior-grade caulk (silicone or polyurethane), galvanized screws or roofing nails. Total tool investment if starting from zero: $150–$400. Skip if not owned: power nailer (rent, ~$30/day), reciprocating saw for trim removal (rent, ~$25/day).
For most major brands (Andersen, Pella, Marvin, Milgard): yes, full DIY install voids the manufacturer warranty entirely. Some brands offer “owner-installer” certifications that preserve coverage if you complete a training course. Lowes/Home Depot windows usually allow DIY without voiding their basic warranty but exclude installation defects from coverage. Read the warranty terms BEFORE buying — the 20-year glass warranty is worth $1,500–$3,000 over the window’s life if you ever have seal failure.
1–2 hours per window for standard replacements (existing frame stays). Full-frame replacements: 2–4 hours per window. Whole-home project for 12 windows: 1–3 days for replacement, 4–7 days for full-frame. Add 30–50% time for second-story or oversized installs. Lead time from contract to install: 4–10 weeks for stock sizes during normal season, 8–14 weeks for spring/summer peak demand or custom orders.
Ready to fix your windows? Get a free quote in 30 seconds.
Family-owned, licensed & insured. Most quotes delivered the same day.