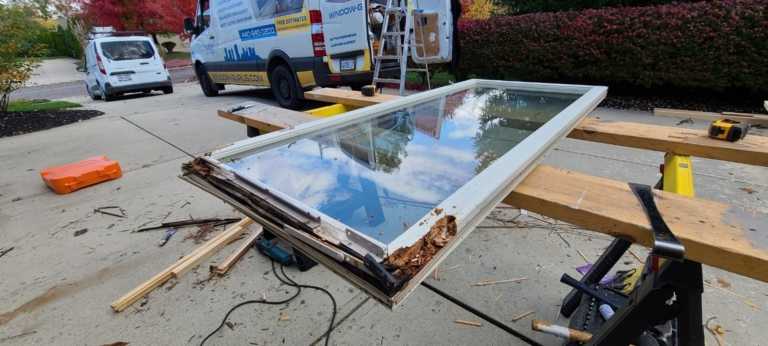
The sound of shattering glass cuts through any quiet evening like a warning bell — whether it’s from a baseball gone astray, a sudden storm, or an unfortunate accident. In my decade repairing windows across Ohio, I’ve seen homeowners freeze in panic, unsure whether to grab a broom first or call 911. Here’s what you actually need to know: the first five minutes after a window breaks determine whether you’re dealing with a simple repair or a cascade of problems — from security risks to weather damage to skyrocketing energy bills.
“When a window breaks, your home’s protective barrier is compromised. The difference between a $200 repair and a $2,000 disaster often comes down to how quickly and correctly you respond in those critical first moments.” — Aleksandr Kubai, Window Restoration Specialist, Window Gurus
This isn’t about creating panic — it’s about preparation. I’ve walked homeowners through emergency repairs at 2 AM during ice storms and helped families secure their homes after break-ins. Every situation taught me that knowledge, not speed, prevents chaos. Whether you’re dealing with a hairline crack or a completely shattered pane, this guide will walk you through immediate safety steps, temporary fixes that actually work, and how to plan for a permanent solution without getting taken advantage of by emergency repair scams.

Key Takeaways
- First 5 minutes: clear the area, gear up (shoes + gloves), apply packing tape grid both sides to stabilize cracks, cover exterior with plastic sheeting.
- Best temporary fix: 1/2″ plywood, 1″ oversized, 2½” screws at 12″ spacing. ~$15–$30, holds for months. Plastic + duct tape only for short-term hold (days, not weeks).
- Insurance reality: covered for sudden events (storms, vandalism), NOT seal failure or rot. Single-window claim usually below the $500–$1,500 deductible — pay out of pocket.
- DIY vs pro: single-pane simple frame = DIY ($50–$150 in materials). Tempered glass, double/triple pane, or 2nd-floor windows = pro job ($150–$500 per window).
- Don’t: try to remove tempered glass yourself (can shatter explosively), use garbage bags as cover (fail in wind), or wait more than 48 hours — moisture damage compounds fast.
First 5 Minutes: What to Do Immediately When a Window Breaks
Before you touch anything, assess the damage from a safe distance.
Step 1: Prioritize Safety – Secure the Area and Yourself
If the break was caused by impact — a thrown object, attempted break-in, or severe weather — there may be glass scattered both inside and outside your home. Your first action is containment, not cleanup.
Clear the area of people and pets immediately. Glass shards can travel surprisingly far — I’ve found fragments fifteen feet from the impact point in living rooms. If you have children or animals, move them to another room and close the door. Don’t let anyone walk through the area barefoot or in socks; even tiny slivers of glass can embed in skin or paws.
Put on thick-soled shoes — work boots are ideal — and heavy gloves before approaching the window. Leather work gloves or heavy-duty rubber gloves protect your hands from cuts during initial assessment and cleanup. If the window is still partially intact but unstable (hanging shards, cracked but not fallen), don’t touch it. Tempered glass, common in doors and large windows, can suddenly collapse into thousands of pieces if disturbed.
If the break happened at night or during bad weather, your immediate concern shifts to preventing further intrusion — both human and environmental. A broken ground-floor window is a security risk; a broken upper-floor window during a storm can let in gallons of water. In these cases, move quickly to step two, but never sacrifice safety for speed.
Step 2: Carefully Clean Up All Broken Glass
Glass cleanup isn’t just sweeping and moving on — it’s a methodical process that prevents injuries days later when you find a missed shard with your bare foot. I’ve seen homeowners rush this step and regret it for weeks.
Start with the largest pieces. Wearing your gloves, carefully pick up any large shards and place them in a thick cardboard box or a puncture-resistant container — never a thin plastic bag that can tear. Work from the outside edges of the debris field toward the center, so you’re not stepping over glass you’ve already cleared.
For smaller fragments, use a stiff-bristled broom to sweep glass into a pile, but don’t rely on sweeping alone. Glass dust and tiny slivers are nearly invisible but just as dangerous. After sweeping, go over the area with a vacuum cleaner equipped with a hose attachment. Pay special attention to corners, baseboards, and any cracks in flooring where fragments can hide.
Here’s a professional trick: after vacuuming, press a piece of duct tape or packing tape sticky-side-down across the floor in overlapping strips. This picks up micro-fragments that even a vacuum misses. I learned this method after a client called me back three days after a repair because their child found glass in their sock — the tape method hasn’t failed since.
If glass fell onto carpet, vacuum thoroughly, then go over the area with a lint roller. For upholstered furniture near the break, use the vacuum’s upholstery attachment and inspect cushions carefully — glass can work its way deep into fabric.
Once you’ve cleared visible glass, wipe down hard surfaces with a damp paper towel (not a reusable cloth — you’ll never get all the glass out). Dispose of all cleanup materials — the cardboard box, vacuum bag, tape strips, paper towels — in a sealed trash bag marked “GLASS” so sanitation workers know to handle it carefully.
Never rush this process. A thorough cleanup takes 30-45 minutes for a standard window break, but it’s time well spent. The goal isn’t just removing glass you can see — it’s making the space safe enough that you won’t worry every time someone walks through barefoot.

How to Temporarily Cover a Broken Window (DIY Emergency Board-Up)
Gather Your Emergency Repair Materials & Tools (Checklist)
Before you start any temporary repair, assemble everything you’ll need. Running back and forth to the hardware store with an open window defeats the purpose of acting quickly. Here’s what works:
For plywood board-up:
- Plywood sheet (½-inch or ¾-inch thickness, sized to cover the entire window frame with 2-3 inches of overlap on all sides)
- Cordless drill with Phillips head bit
- 2-inch exterior-grade screws (at least 12-16 screws)
- Measuring tape
- Pencil
- Safety glasses
- Work gloves
For plastic sheeting weatherproofing:
- Heavy-duty plastic sheeting (6-mil thickness minimum — the stuff sold as painter’s drop cloths won’t hold up)
- Duct tape or weatherproof packing tape
- Staple gun and staples (if you have wooden window frames)
- Scissors or utility knife
- Measuring tape
For minor crack repairs:
- Clear packing tape or glass repair tape
- Glass cleaner and paper towels
- Clear nail polish or super glue (for very small chips)
Keep a basic emergency window repair kit in your garage or basement. I recommend a 4×8 sheet of plywood (you can cut it to size as needed), a roll of 6-mil plastic, a box of exterior screws, and a roll of heavy-duty duct tape. This kit costs around $40-50 and can handle most emergency situations until professional help arrives.
Option 1: Using Plywood for Maximum Security & Weather Protection
Plywood board-up is the gold standard for temporary window repair when security is your primary concern — after a break-in attempt, during a natural disaster, or for ground-floor windows in high-crime areas. It’s also the best option for large breaks or when you know the permanent repair will take several days.
Measure the window opening from outside edge to outside edge of the frame, then add 4-6 inches to both height and width. This overlap ensures the plywood covers the entire opening and provides enough surface area to screw into the frame securely. If you don’t have plywood large enough, you can use two smaller pieces with an overlap in the middle, secured with extra screws.
Cut the plywood to size if necessary. If you’re working alone and don’t have a saw, most hardware stores will cut plywood to your specifications — call ahead with measurements and they’ll have it ready when you arrive.
Position the plywood over the window from the outside if possible. Boarding from the outside is more secure because an intruder can’t simply remove the screws from inside your home. However, if you’re dealing with a second-story window or the exterior is inaccessible, inside mounting works — just use longer screws to ensure they penetrate deep into the frame.
Starting at the corners, drill pilot holes through the plywood and into the window frame. This prevents the wood from splitting and makes screwing easier. Use 2-inch exterior-grade screws, spacing them every 6-8 inches around the perimeter. Don’t skip screws to save time — a loose board is nearly as bad as no board at all.
If your window frame is vinyl or aluminum and won’t hold screws well, you’ll need to screw into the wall framing around the window. This requires locating studs (use a stud finder or tap the wall to find solid areas) and using 3-inch screws that penetrate through the siding and into the structural framing.
A properly installed plywood board-up can last weeks or even months if necessary, though you shouldn’t leave it that long if you can avoid it. I’ve seen homeowners in disaster zones keep plywood up for six months waiting for insurance settlements and contractor availability — the boards held, but the lack of natural light and ventilation takes a toll on quality of life.
Option 2: Using Heavy-Duty Plastic Sheeting for Weatherproofing
Plastic sheeting is your best option when the primary threat is weather — rain, snow, wind — rather than security, or when you need a quick temporary fix for an upper-story window where access is difficult. It’s also ideal for broken windows with intact frames where you don’t want to drill holes.
Use 6-mil plastic sheeting at minimum. The thin 1-mil or 2-mil plastic sold for painting drop cloths will tear in the first strong wind. You want contractor-grade sheeting, often sold as “visqueen” or “poly sheeting” at hardware stores.
Cut the plastic 8-12 inches larger than the window opening on all sides. This extra material gives you enough to fold over for double-layer protection at the edges and ensures complete coverage even if the plastic shifts slightly.
If you have a wooden window frame, the most secure method is stapling. Pull the plastic taut across the window and staple it to the frame every 3-4 inches, starting at the top and working your way around. Fold the plastic over itself at the edges before stapling for a double layer — this prevents tearing at the staple points.
For vinyl, aluminum, or composite frames where stapling isn’t possible, use heavy-duty duct tape or weatherproof packing tape. Clean the frame surface first with rubbing alcohol to ensure good adhesion. Apply tape in overlapping strips, pressing firmly to create a weatherproof seal. I’ve found that 3M’s outdoor mounting tape holds better than standard duct tape in cold or wet conditions.
Here’s a technique that significantly improves plastic sheeting durability: create a “batten” system using thin strips of wood (furring strips or lath). Lay the plastic over the window, then screw or nail the wood strips over the plastic edges into the frame. This distributes stress across the entire edge rather than at individual staple or tape points, and the plastic can last through multiple storm cycles without tearing.
Plastic sheeting won’t stop an intruder, but it will keep out rain, snow, and wind surprisingly well. I’ve used this method on historic homes where drilling into original wood frames wasn’t an option, and the temporary repairs lasted through Ohio winters without issue. The key is using thick enough plastic and securing it thoroughly — a half-done plastic job is worse than nothing because it’ll flap in the wind and potentially cause more damage.
Quick Fixes for Minor Cracks or Holes (Temporary Solution)
Not every broken window requires plywood or plastic sheeting. Small cracks, chips, or holes — particularly in double-pane windows where only the outer pane is damaged — can be temporarily stabilized with simpler methods while you arrange for professional repair.
For a crack that hasn’t shattered the glass: clean both sides of the glass thoroughly with glass cleaner, then apply clear packing tape over the crack on both sides. This serves two purposes — it holds the glass together if the crack tries to spread, and it creates a temporary weather seal. Use wide tape (2-3 inches) and overlap strips by half an inch. This won’t restore the window’s insulation value, but it prevents the crack from growing and keeps out drafts and moisture.
I’ve seen homeowners try to “glue” cracks with super glue or epoxy. This doesn’t work for structural repair — glass cracks propagate from internal stress, and surface adhesive can’t stop that. However, super glue or clear nail polish can seal very small chips (smaller than a dime) to prevent moisture intrusion until you can get a proper repair.
For a small hole or puncture — say, from a BB gun or small thrown object — you can create a temporary patch using clear packing tape on both sides, then seal the edges with clear silicone caulk. This is purely a stopgap measure; the window will still need replacement, but it keeps the weather out for a few days.
If you have a double-pane window where only the outer pane is broken but the inner pane is intact, you’re still protected from the elements, but you’ve lost the insulation value. In this case, taping the outer pane prevents glass from falling out, but understand that your energy bills will spike until you get it properly repaired. A broken outer pane also means moisture can enter the space between panes, causing fogging that can’t be removed without replacing the entire insulated glass unit.
These quick fixes are exactly that — quick. They’re meant to buy you 24-72 hours until you can implement a more robust temporary solution or get a professional repair scheduled. Don’t treat them as long-term solutions, because they’re not designed to withstand weather cycles, temperature changes, or the structural stresses that windows endure.

Why You Must Act Fast: The Risks of a Broken Window
A broken window is an open invitation to opportunistic criminals.
Security Vulnerabilities
Even if the break was accidental, it signals to anyone passing by that your home’s defenses are compromised. In neighborhoods with higher crime rates, a visible broken window can attract break-ins within hours.
Ground-floor and basement windows are particularly vulnerable. I’ve responded to emergency calls where the homeowner discovered a break-in attempt within 24 hours of the initial window damage — the original break was from a storm, but someone noticed and took advantage. The temporary board-up I installed cost $150; the homeowner’s losses from the attempted burglary (damaged door frame, stolen electronics) exceeded $3,000.
Even upper-story windows pose risks if they’re accessible via nearby trees, fire escapes, or roof access. Professional burglars know that homeowners often delay repairing second-floor damage, assuming it’s “safe enough.”
The psychological impact matters too. Sleeping in a home with a broken window creates anxiety, especially for families with children. That stress alone justifies immediate temporary repair, even if the permanent fix must wait for insurance processing or contractor availability.
Weather and Pest Intrusion
A single broken window can let in enough rain during a storm to cause thousands of dollars in water damage. I’ve seen hardwood floors buckle, drywall develop mold, and furniture ruined because homeowners underestimated how much water could enter through a “small” opening.
Wind doesn’t just bring discomfort — it can cause structural damage. Strong winds entering through a broken window create positive pressure inside your home, which can stress roof structures, blow out other windows, or lift shingles. During severe weather, the pressure differential can be enough to cause serious damage to your home’s envelope.
Temperature extremes are equally problematic. A broken window in winter can freeze pipes in adjacent walls, leading to burst pipes and flooding when temperatures rise. In summer, the heat and humidity entering through a broken window can overwhelm your HVAC system, spiking energy bills and potentially causing the system to fail from overwork.
Pests see a broken window as an open door. Insects, rodents, birds, and even larger animals (raccoons, squirrels) can enter through surprisingly small openings. I’ve pulled bird nests out of broken window cavities and dealt with wasp infestations that started because a homeowner left a cracked window “temporarily” unrepaired for two weeks.
Risk of Further Damage
Glass that’s cracked but not completely shattered is unstable. Temperature changes, vibrations from traffic or household activity, even wind pressure can cause a crack to suddenly propagate, turning a small problem into a complete failure. I’ve seen cracks that were “stable” for days suddenly spiderweb across an entire pane during a cold snap.
Broken glass edges are sharp and unpredictable. A partially shattered pane can collapse without warning, potentially injuring anyone nearby. This is particularly dangerous with tempered glass, which can hold together in a cracked state for hours before suddenly exploding into thousands of pieces.
If your window has a broken seal on a double-pane unit, moisture will enter the space between panes, causing permanent fogging that can’t be cleaned. This doesn’t just look bad — it reduces the window’s insulation value and can lead to mold growth between the panes. Once moisture gets in, the entire insulated glass unit must be replaced; there’s no way to “dry it out.”
Delaying repair also risks frame damage. Moisture entering through a broken window can rot wooden frames, corrode metal frames, or degrade vinyl frames. What starts as a $200 glass replacement can become a $1,500 frame replacement if water damage is allowed to progress.
The financial calculation is simple: a temporary board-up costs $50-150 in materials and 1-2 hours of time. The potential costs of delaying — break-in losses, water damage, pest remediation, expanded repair scope — can easily exceed $5,000. Act fast not because you’re panicking, but because you’re being smart.

Diagnosis: Understanding the Problem Before a Permanent Fix
Impact breaks are the most obvious — you see the point of impact, there’s a projectile involved (rock, ball, hail), and the damage radiates from a central point.
What Caused the Window to Break? (Impact, Stress, Poor Installation)
These breaks are usually covered by homeowner’s insurance under the “sudden and accidental” clause, though you’ll need to document the damage with photos and potentially file a police report if vandalism is suspected.
Stress cracks appear without obvious impact and typically start at the edge of the glass, running in relatively straight lines across the pane. These are caused by thermal stress (rapid temperature changes), structural settling of the house, or improper installation that puts pressure on the glass. Stress cracks indicate a deeper problem — simply replacing the glass without addressing the underlying cause means you’ll likely see another crack within months.
I’ve diagnosed stress crack patterns that revealed foundation settling, improperly shimmed frames, and even cases where the wrong glass type was installed for the climate. In one memorable case, a homeowner had replaced all their windows with cheap single-pane glass in an old house with significant seasonal movement — every winter, thermal stress cracked at least two windows. The permanent solution wasn’t better glass; it was properly installed double-pane units with flexible glazing that could accommodate the building’s movement.
Seal failure in double-pane windows doesn’t break the glass, but it ruins the window’s performance. You’ll see condensation or fog between the panes that can’t be wiped away. This happens when the hermetic seal around the insulated glass unit fails, allowing moisture to enter. It’s most common in windows 15-20 years old, particularly in climates with large temperature swings. The only fix is replacing the entire insulated glass unit — the glass itself is fine, but the sealed unit is compromised.
Poor installation is an underdiagnosed cause of window failure. Windows installed without proper shimming, with inadequate weatherproofing, or in frames that don’t match the window size will develop problems. I’ve seen new windows crack within months because the installer forced them into undersized openings, creating constant stress on the glass.
Understanding the cause matters for insurance claims, for preventing recurrence, and for choosing the right permanent repair. Document everything: take photos of the damage from multiple angles, note weather conditions if relevant, and keep any projectiles or debris that caused the break.
Identify Your Window & Glass Type (Single-Pane, Double-Pane, Tempered)
Not all glass is the same, and the type you have determines repair options, costs, and urgency. Here’s how to identify what you’re dealing with:
Single-pane windows are exactly what they sound like — one layer of glass in a frame. They’re common in older homes (pre-1980s) and in unheated spaces like garages or sheds. You can identify them by tapping the glass and listening for a single, clear tone, or by looking at the edge — you’ll see only one layer of glass in the frame. Single-pane breaks are the simplest and cheapest to repair, typically $100-300 for professional replacement including labor.
Double-pane (insulated glass units) have two layers of glass with an air or gas-filled space between them for insulation. Look at the edge of the glass in the frame — you’ll see two distinct layers with a spacer between them. If you tap the glass, you’ll hear a slightly duller sound than single-pane. These windows are standard in modern construction and energy-efficient retrofits. Repair costs $200-600 depending on size, glass type, and whether you’re replacing just the glass unit or the entire sash.
Tempered glass is heat-treated for strength and safety — when it breaks, it shatters into small, relatively harmless cubes rather than dangerous shards. It’s required by building code in certain locations: doors, sidelights, windows within 18 inches of doors, bathroom windows, and any glass within 60 inches of the floor in high-traffic areas. You can identify tempered glass by looking for a small etched mark in one corner (usually says “tempered” or has a manufacturer’s stamp). If the glass has already shattered into thousands of small pieces, it was definitely tempered. Tempered glass can’t be cut or modified after tempering, so replacement requires ordering a custom piece — costs run $300-800 depending on size.
Laminated glass has a plastic interlayer between two glass sheets, similar to car windshields. When it breaks, the glass cracks but stays adhered to the plastic layer rather than falling out. It’s used for security, soundproofing, and hurricane protection. You can identify it by looking at the edge — you’ll see the plastic layer sandwiched between glass layers. Laminated glass replacement is expensive ($500-1,500) because it’s specialty glass, but it provides superior security and safety.
Low-E and other coated glass has invisible metallic coatings that reflect heat. You can’t always identify it visually, but if your windows are relatively new (post-2000) and were marketed as energy-efficient, they likely have Low-E coating. This matters for replacement because you’ll want to match the coating to maintain energy efficiency. Replacement costs are similar to standard double-pane, but you’ll pay a premium ($50-150 more) for the coating.
Here’s a quick reference table to help identify your glass type and understand repair implications:
| Glass Type | How to Identify | Typical Age | Break Pattern | Repair Complexity | Typical Cost Range |
|---|---|---|---|---|---|
| Single-Pane | One layer visible at edge, clear tone when tapped | Pre-1980s homes | Large shards, dangerous edges | Simple – DIY possible | $100-$300 |
| Double-Pane | Two layers with spacer, duller sound | 1980s-present | Varies, may fog if seal breaks | Moderate – requires IGU replacement | $200-$600 |
| Tempered | “Tempered” etched mark, shatters into cubes | Required by code in specific locations | Thousands of small cubes | Moderate – must order custom | $300-$800 |
| Laminated | Plastic layer visible at edge, stays together when broken | Security/hurricane zones | Cracks but doesn’t fall out | Complex – specialty glass | $500-$1,500 |
| Low-E Coated | Often not visible, common in modern energy-efficient windows | 2000s-present | Same as base glass type | Moderate – coating adds cost | Base cost + $50-$150 |
Knowing your glass type before calling for quotes prevents surprises and helps you evaluate whether a contractor’s estimate is reasonable. If someone quotes you $800 for a standard single-pane window replacement, you’re being overcharged. If they quote $200 for tempered glass, they either don’t understand what they’re replacing or they’re planning to install non-code-compliant glass.

When to DIY vs. Call an Emergency Glass Repair Professional
You can likely DIY if:
- The break is in a single-pane window in a non-critical location (basement, garage, shed)
- You’re only doing a temporary board-up or plastic sheeting cover
- The window frame is in good condition and easily accessible
- You have basic tools and feel comfortable working with them
- The glass is standard size and type (not tempered, not laminated)
- There’s no immediate security threat or severe weather approaching
You should call a professional if:
- The break involves tempered glass (required by code in many locations)
- It’s a double-pane window and you want to maintain energy efficiency
- The window is on the second story or higher and requires ladder work
- The frame is damaged, rotted, or needs structural repair
- You’re dealing with historic or specialty windows (curved glass, stained glass, antique hardware)
- The break happened during a break-in attempt and you need documentation for police/insurance
- You’re uncomfortable with tools, heights, or the scope of the work
I’ve seen well-intentioned DIY attempts that cost more to fix than the original repair would have cost. A homeowner tried to replace a double-pane unit themselves, cracked the new glass during installation because they didn’t understand the shimming requirements, then called me to fix both the original break and the new damage. What would have been a $350 professional job became $600 after the DIY attempt.
That said, I’ve also seen homeowners successfully handle temporary repairs that bought them time to save up for a quality permanent fix rather than rushing into a predatory emergency service contract. The key is honest self-assessment: if you’re not confident, don’t risk it.
Situations That Absolutely Require a Professional
Some window situations are dangerous or legally complex enough that DIY isn’t just inadvisable — it’s potentially illegal or unsafe. Here’s when you must call a professional:
Tempered glass replacement: Building codes require tempered glass in specific locations for safety. Installing non-tempered glass in these locations violates code, creates liability if someone is injured, and can cause problems when you sell your home. Professionals have the equipment to handle large tempered panels safely and the knowledge to ensure code compliance.
Second story and higher: Ladder work on upper-story windows is the leading cause of DIY injury in home repairs. Professionals have proper scaffolding, safety harnesses, and insurance. If you fall off a ladder and injure yourself, your homeowner’s insurance may deny the claim if they determine you were performing unsafe work.
Structural frame damage: If the window frame is rotted, damaged, or structurally compromised, replacing just the glass won’t solve the problem. Frame repair or replacement requires carpentry skills, understanding of building envelope principles, and often involves matching historic materials or meeting modern energy codes.
Historic or architectural glass: Curved glass, stained glass, leaded glass, or antique windows require specialized skills and materials. I’ve restored Victorian-era windows with original wavy glass — the replacement glass alone cost $400 per pane because it had to be hand-made to match the period-correct appearance. Attempting DIY on these windows can destroy irreplaceable historical elements.
Insurance claim situations: If you’re filing an insurance claim, the insurance company will likely require professional documentation of the damage and professional installation of the replacement. DIY repairs can give them grounds to deny the claim or reduce the payout. Always check with your insurance adjuster before proceeding with any permanent repair.
Security-related breaks: If your window was broken during a break-in or vandalism, you need professional documentation for the police report and insurance claim. Many glass companies work directly with law enforcement and insurance companies, providing the necessary paperwork and evidence preservation.
At Window Gurus, we’ve handled emergency calls where homeowners initially tried DIY repairs, then called us when they realized the scope of the problem. We never judge — we just fix it right. The most important thing is recognizing when you’re out of your depth and getting help before the problem gets worse.
How to Choose a Reputable Emergency Repair Company
Emergency situations create vulnerability, and unfortunately, some contractors take advantage. I’ve seen homeowners charged $1,500 for repairs that should have cost $300, or locked into contracts that required unnecessary full window replacement when glass-only repair would have sufficed.
Here’s how to protect yourself when choosing an emergency glass repair service:
Verify licensing and insurance immediately. A legitimate glass company will have a business license, liability insurance, and workers’ compensation insurance. Ask for proof before they start work. If they hesitate or say they’ll “email it later,” walk away. In Ohio, you can verify contractor licensing through the state’s commerce department website.
Get multiple quotes if time allows. I know “emergency” implies urgency, but unless you’re dealing with an active security threat or severe weather, you have time to call 2-3 companies for phone quotes. Describe the damage, the window type, and your location. Quotes should be within 20-30% of each other. If one is dramatically higher or lower, that’s a red flag.
Ask about their emergency service fees upfront. Many companies charge a premium for after-hours, weekend, or emergency service — typically $75-150 on top of the base repair cost. This is reasonable if disclosed upfront. What’s not reasonable is surprise fees added after the work is done.
Beware of “you need a full replacement” pressure. Some companies make more money on full window replacement than on glass-only repairs, so they’ll push replacement even when it’s not necessary. A broken pane in a sound frame almost never requires full window replacement. Get a second opinion if you’re being pressured.
Check online reviews, but read them critically. Look for patterns in reviews, not just star ratings. Do multiple reviews mention the same problems (late arrivals, surprise fees, poor quality)? Are there responses from the company addressing complaints? A company with a few negative reviews that they’ve addressed professionally is often better than a company with only glowing reviews (which might be fake).
Ask about warranty on both materials and labor. Reputable companies warranty their glass for defects (typically 1-2 years) and their installation work (typically 1 year). If they don’t offer any warranty, that’s a red flag.
Trust your gut on high-pressure sales tactics. If a company is pushing you to sign a contract immediately, offering a “discount only if you decide right now,” or using scare tactics about security or weather, that’s a manipulation technique. Legitimate companies want your business, but they don’t need to trick you into it.
At Window Gurus, we’ve built our reputation on transparency: we provide written quotes before starting work, we explain exactly what’s needed and why, and we never push services you don’t need. Our A+ BBB rating and hundreds of positive reviews exist because we treat emergency calls the same way we treat scheduled maintenance — with professionalism and respect for the homeowner’s situation.
When you’re stressed about a broken window, the last thing you need is a contractor who adds to that stress. Take the time to choose someone reputable, even in an emergency. The hour you spend making calls and checking references can save you thousands in overcharges or shoddy work.

Planning the Permanent Solution: Replacement & Insurance
Not every broken window requires the same solution.
Assessing the Damage for Long-Term Repair Options
The permanent repair depends on the extent of damage, the age and condition of the window, and your long-term goals for the home.
Glass-only replacement is the right choice when the frame is sound, the break is limited to the glass itself, and the window is otherwise functional. This is the most common and cost-effective repair. A professional removes the broken glass, cleans the frame, installs new glass with proper glazing compound or gaskets, and ensures a weathertight seal. Cost: $150-600 depending on glass type and size.
Sash replacement is needed when the moving part of the window (the sash) is damaged beyond just the glass — cracked wood, broken muntins (the dividers between panes), damaged hardware, or rot. The frame stays in place, but the sash is replaced with a new unit. This is common in older double-hung windows where the sash has deteriorated but the frame is still solid. Cost: $300-800 per sash.
Full window replacement is the right choice when the frame is damaged, rotted, or failing; when you’re upgrading to more energy-efficient windows; or when the window is so old that finding matching replacement parts is impossible or cost-prohibitive. This involves removing the entire window unit and installing a new window, which may require some carpentry and interior/exterior finish work. Cost: $500-1,500+ per window depending on size, style, and quality.
Restoration instead of replacement is worth considering for historic homes or high-quality older windows. Many wood windows built before 1950 were made from old-growth lumber that’s superior to modern materials. Restoration — repairing the frame, replacing glass, rebuilding sashes, adding weatherstripping — can give you a window that performs as well as a new one while preserving the home’s character. Cost: $800-2,000 per window, but you’re preserving value and historical integrity.
I’ve restored windows in homes built in the 1920s that, after repair, tested better for air infiltration than the cheap vinyl replacements the homeowner was considering. The key is honest assessment: is the frame fundamentally sound, or has rot/damage progressed too far? A professional can help you make that call.
Here’s what I tell homeowners: if you’re dealing with one broken window in a house full of functional windows, repair or replace that one window to match what you have. If you’re dealing with multiple failures, or if your windows are approaching the end of their lifespan (20-30 years for most modern windows), consider whether this is the trigger for a whole-house window upgrade. Sometimes a broken window is the wake-up call that your home needs a comprehensive energy efficiency improvement.
Navigating Homeowner’s Insurance Claims for a Broken Window
Whether your insurance covers a broken window depends on your policy, the cause of the break, and your deductible. Here’s how to navigate the process without getting denied or underpaid.
Understand what’s typically covered: Most homeowner’s policies cover “sudden and accidental” damage — storm damage, vandalism, break-ins, objects thrown through windows. They typically don’t cover wear and tear, gradual deterioration, or damage from lack of maintenance. A window that cracked from old age won’t be covered; a window broken by hail will be.
Document everything before cleanup: Take photos of the damage from multiple angles, both interior and exterior. Photograph any debris, projectiles, or evidence of the cause. If there’s weather damage, photograph the weather conditions if possible. This documentation is crucial for your claim. I’ve seen claims denied because the homeowner cleaned up everything before the adjuster arrived, and the insurance company claimed there was insufficient evidence of covered damage.
File the claim promptly: Most policies require notification within a specific timeframe (often 48-72 hours) of discovering the damage. Even if you’re not sure you’ll file a claim (because the damage might be less than your deductible), report it. You can always decide not to pursue the claim after getting an estimate.
Get a professional estimate: Insurance companies typically require a professional repair estimate. Some will send their own adjuster; others will accept estimates from licensed contractors. Get a detailed written estimate that breaks down labor and materials. At Window Gurus, we provide insurance-ready estimates that include photos, measurements, and itemized costs — adjusters appreciate the thoroughness.
Understand your deductible: If your deductible is $1,000 and the repair costs $800, insurance won’t pay anything. Many homeowners don’t realize this and file claims for minor damage, which can raise their premiums without providing any benefit. Do the math before filing.
Know the difference between replacement cost and actual cash value: Replacement cost policies pay to replace the window with a new one of similar quality. Actual cash value policies pay replacement cost minus depreciation. A 15-year-old window might cost $600 to replace, but its actual cash value might only be $300. Make sure you understand which type of policy you have.
Beware of claim impact on premiums: Filing a claim, even a covered one, can raise your premiums at renewal. For small claims (under $2,000), it’s often cheaper in the long run to pay out of pocket rather than file a claim. Talk to your insurance agent about the potential premium impact before filing.
Don’t let the insurance company dictate your contractor: You have the right to choose your own contractor for repairs. Some insurance companies will suggest “preferred” contractors — these relationships can be fine, but you’re not obligated to use them. Choose a contractor based on reputation and quality, not just because the insurance company recommends them.
I’ve worked with dozens of insurance claims over the years. The ones that go smoothly have thorough documentation, prompt filing, and realistic expectations about coverage. The ones that turn into nightmares involve homeowners who assumed coverage without checking, failed to document damage, or accepted the first lowball estimate from an adjuster without pushing back.

How to Prevent Future Window Breakages
Install window security film: This clear polyester film adheres to glass and holds it together if it breaks, similar to how laminated glass works.
Home Security & Reinforcement Tips
It won’t prevent breaks, but it makes it much harder for an intruder to gain entry because the glass doesn’t shatter and fall out. Security film costs $6-12 per square foot installed and is worth considering for ground-floor windows in high-crime areas.
Add window locks and reinforcements: Many windows, especially older ones, have inadequate locks. Aftermarket window locks (sash locks for double-hung windows, pin locks for sliding windows) cost $10-30 and significantly improve security. For sliding windows, placing a cut-to-length dowel or metal bar in the track prevents the window from being forced open even if the lock is defeated.
Trim trees and shrubs near windows: Branches rubbing against windows during wind can cause scratches that weaken glass over time. More importantly, overgrown vegetation provides cover for would-be intruders. Keep shrubs below window sill height and tree branches at least 3 feet from the house.
Install motion-sensor lighting: Well-lit windows are less attractive targets for break-ins. Motion-sensor lights are inexpensive ($20-50) and eliminate the need to remember to turn on exterior lights.
Consider security shutters or grilles for high-risk windows: If you live in an area with frequent break-ins, or if you’re away from home for extended periods, security shutters or decorative window grilles provide physical barriers that are difficult to defeat. These range from $200-1,000 per window depending on style and security level.
Use window alarms: Simple window alarms that sound when a window is opened or broken cost $10-20 per window and are effective deterrents. More sophisticated systems integrate with whole-home security systems.
At Window Gurus, we’ve installed security film on commercial properties in high-crime areas and seen dramatic reductions in break-in attempts. The film doesn’t make windows unbreakable, but it makes them difficult enough to breach that most intruders move on to easier targets.
Regular Maintenance and Inspection
Most window failures are preceded by warning signs that homeowners miss because they don’t inspect windows regularly. Here’s a maintenance schedule that prevents problems:
Annually:
- Inspect all windows for cracks, chips, or stress lines in the glass
- Check weatherstripping and caulking for gaps, cracks, or deterioration
- Test window operation — they should open and close smoothly without sticking
- Inspect frames for rot (wood), corrosion (metal), or warping (vinyl)
- Clean weep holes (small drainage holes in the bottom of window frames) to prevent water buildup
- Lubricate moving parts (hinges, locks, sliding tracks) with silicone spray
Seasonally (spring and fall):
- Clean windows inside and out to inspect for damage and improve visibility
- Check for condensation between panes on double-pane windows (indicates seal failure)
- Inspect and clean window screens
- Test locks and latches to ensure they’re secure
After storms or extreme weather:
- Walk the perimeter of your home looking for impact damage, blown debris, or cracks
- Check for water intrusion around windows
- Inspect for any new gaps in caulking or weatherstripping
Warning signs that indicate a window needs professional attention:
- Condensation or fog between panes that won’t clear (seal failure)
- Difficulty opening or closing (frame warping or hardware failure)
- Drafts even when the window is closed (weatherstripping failure)
- Visible rot in wooden frames (structural failure)
- Cracks in glass, even small ones (stress failure in progress)
- Water stains on interior sills or walls near windows (leaks)
I’ve found that homeowners who follow a simple annual inspection routine catch problems when they’re minor and inexpensive to fix. The ones who call me in a panic usually ignored warning signs for months or years until a small problem became a major failure.
Regular maintenance also extends window lifespan. A well-maintained wood window can last 50+ years; a neglected one might fail in 15. Modern vinyl and fiberglass windows require less maintenance than wood, but they still benefit from regular inspection and cleaning.

FAQ: Emergency Window Repair
Quick answers to common reader questions, drawn directly from real search intents.
You can’t effectively repair a double-pane window yourself if the seal has failed or the glass is broken. Double-pane windows are sealed units (insulated glass units, or IGUs) that are manufactured in controlled environments. Once the seal breaks or the glass cracks, the entire unit must be replaced. You can’t “re-seal” a double-pane window or replace just one pane — the unit is designed as a single sealed assembly. Tempered glass also can’t be repaired. Once it’s broken, it must be completely replaced, and because tempered glass is heat-treated, it can’t be cut to size after tempering. This means replacement tempered glass must be custom-ordered to exact specifications, which typically takes 3-7 days and requires professional installation to ensure it meets code requirements. What you can do yourself is remove the broken IGU from the sash (the moving part of the window) and take it to a glass shop for measurement and ordering. However, reinstalling the new unit requires proper glazing technique, weatherproofing, and often specialized tools. Unless you have experience with window glazing, professional installation is worth the cost to ensure the window performs correctly and doesn’t leak. For temporary measures, you can certainly board up or plastic-sheet a broken double-pane or tempered window yourself. That’s a smart DIY move that secures your home while you arrange professional replacement.
Three options ranked by speed and effectiveness: (1) heavy-duty clear plastic sheeting + duct tape — 5 min, $15, holds 2–3 weeks; (2) plywood board cut to fit + screws into the frame — 30 min, $20, secure for months; (3) packing tape grid pattern over the cracked glass to prevent shards falling — 5 min for a hold-the-line cover until permanent repair. Plywood is best for any window over 6 sq ft or above ground floor.
Immediate steps in order: (1) keep pets and kids out of the room; (2) put on shoes and gloves before approaching; (3) apply clear packing tape in a grid pattern over the crack on both sides — this prevents the glass from collapsing inward; (4) if it’s exterior, cover the outside with plastic sheeting taped to the frame; (5) call your insurance and a glazier within 24 hours. Don’t try to remove the glass yourself — improperly handled tempered glass can explode.
Standard homeowners insurance covers window damage from sudden events: storms, vandalism, theft, accidents (a kid’s ball, a fallen tree limb). It does NOT cover wear-and-tear, seal failure (foggy double-pane), or gradual rot. Deductibles ($500–$1,500 typical) often exceed the cost of a single window repair, so most homeowners pay out of pocket for one window. File a claim only if multiple windows are damaged or the cost exceeds your deductible.
Best method: 1/2″ exterior-grade plywood, cut 1″ larger than the opening on all sides, secured with 2½” screws driven into the window frame at 12″ spacing. Cost: $15–$30. For temporary plastic-only solutions, use 6 mil polyethylene sheeting (not garbage bags — they fail in wind), overlap the frame by 4″ on all sides, secure with screws driven through 1×2 wood lath. Plain duct tape on glass alone fails within days in temperature swings.