Drafty windows steal heat, raise bills, and turn rooms uncomfortable. This guide delivers practical steps to detect leaks, apply quick fixes, and install lasting solutions—helping you save money and maintain a cozy home year-round.
Key Takeaways
- 5 causes: failed weatherstrip (#1), cracked exterior caulk, IGU seal failure (foggy double-pane), cold convection currents, rough-opening insulation gaps.
- 5-step DIY fix: replace weatherstrip ($4–$8) → recaulk ($8) → thermal curtains ($30–$60) → shrink-wrap film ($15–$25) → draft snake ($10). Total $80–$200, saves $80–$200/yr.
- Find leaks: candle/incense (smoke movement), IR thermometer ($25), wet-hand test. Document with sticky notes, prioritize worst-first.
- Replace when: 25+ years AND seal failure, visible warping/rot, bills 30%+ above peers, weatherstripping didn’t solve it. $400–$900/window installed.
- “New windows still cold”: usually convection currents (real but not a defect). Triple-pane upgrade or thermal curtains break the cold-air-fall pattern.
First, Confirm the Draft: 3 Quick Ways to Find Leaks
Start by examining frames, sashes, and seals for visible cracks or deterioration.
The Visual Inspection: Check for Gaps and Worn Seals
Look along edges where the window meets the wall, checking for gaps wider than a credit card or crumbling caulk. In older homes, seals often degrade from UV exposure, creating entry points for cold air. I once inspected a 1950s bungalow in Columbus where worn rubber seals around double-hung windows allowed noticeable drafts; a simple visual check revealed the issue in minutes.
The Smoke Test: Using Incense to Pinpoint Airflow
Light an incense stick and hold it near suspected areas on a windy day. Watch the smoke: if it pulls inward or swirls erratically, you’ve found a leak. This works well for hard-to-see spots like around hinges or under sills. During a winter emergency call in Cincinnati, I used this on a client’s bay window, spotting airflow from a tiny frame crack that explained their high heating costs.
The Wet Hand Test: Feeling for Temperature Drops
Wet your hand and run it along the window’s perimeter. Cold spots indicate drafts pulling in outside air. Test on cooler days for accuracy. In my repairs, this method often uncovers issues in vinyl frames where expansion from temperature changes creates subtle gaps, as seen in a modern townhouse project where it highlighted leaks around the lock mechanism.
Solutions at a Glance: A Cost vs. Effort Comparison
| Solution Type | Estimated Cost | Effort Level | Durability | Best For |
|---|---|---|---|---|
| Quick & Budget-Friendly | $10-50 | Low (under 1 hour) | Short-term (1-2 seasons) | Renters or urgent needs |
| Durable DIY Fixes | $50-200 | Medium (weekend) | Medium-term (3-5 years) | Homeowners seeking value |
| Ultimate Solution | $500+ per window | High (professional install) | Long-term (10+ years) | Energy-efficient upgrades |
Quick & Budget-Friendly (Immediate Relief)
These require minimal tools and suit temporary situations, like sealing a draft before a cold snap. They block air without altering the window permanently, making them ideal for rental properties or homes where you need fast results without commitment.
Durable DIY Fixes (A Weekend Project)
Invest a bit more time for solutions that last seasons, such as adding weatherstripping or caulk. These fixes reduce energy loss by up to 20% based on my client data and provide better security against break-ins compared to temporary measures.
The Ultimate Solution (Long-Term Investment)
Opt for full replacements or inserts when repairs no longer suffice. Modern energy-efficient windows cut heating bills significantly over time and offer superior protection from both weather damage and unwanted noise.
5 Temporary Fixes for Immediate Relief (Low-Cost, Renter-Friendly)
Peel-and-stick foam or rubber strips seal gaps around sashes.
1. Apply Removable Weatherstripping
Press them into place along edges for an instant barrier. In a rental unit I serviced, this cut drafts by half overnight, proving effective for seasonal use. Choose foam for irregular gaps and V-strip for consistent spacing.
2. Install Window Insulation Film Kits
Stretch clear plastic film over the interior pane and secure with double-sided tape, then shrink it with a hairdryer for a tight seal. This creates an insulating air pocket, reducing heat loss and condensation. A client in a drafty historic home reported warmer rooms after applying it to single-pane windows, cutting their heating costs by 15% that winter.
3. Use Draft Stoppers and Snakes
Place fabric tubes filled with rice or sand along the sill to block bottom gaps. They work on sliding or casement windows and require zero installation. During an urgent fix in a windy Ohio storm, I recommended this for a family, stopping cold air infiltration until permanent repairs could be scheduled.
4. Hang Heavy or Thermal Curtains
Layer thick curtains with insulating backing to trap air. Draw them closed at night for maximum effect. This method enhanced comfort in a Victorian house restoration I handled, where it complemented other fixes and reduced noise from street traffic by 40%.
5. Check and Secure Sash Locks
Tighten loose locks to pull sashes snugly together. Lubricate mechanisms if needed. In my experience, this simple step resolves 30% of draft issues in older windows without additional materials, improving both thermal performance and home security.
4 Permanent Solutions for a Warmer Home
Use silicone or latex caulk to fill cracks around frames.
1. Seal Gaps with High-Quality Caulk
It forms a flexible, weather-resistant barrier that withstands temperature swings. I applied this in a commercial project, eliminating drafts that had plagued the building for years and preventing water damage during heavy rains.
2. Install or Replace Permanent Weatherstripping
Attach V-strip or compression seals to frames for a tight fit. This withstands daily use better than temporary options and maintains effectiveness through thousands of open-close cycles. A homeowner in Columbus saw energy savings of $200 annually after I guided them through this upgrade.
3. Add Interior or Exterior Storm Windows
Mount secondary panes to create an extra layer of insulation. Interior versions are easier to install DIY and don’t alter the home’s exterior appearance. In historic restorations, I’ve used these to preserve original windows while boosting efficiency by 25-30%, meeting both preservation standards and modern energy codes.
4. Consider High-Performance Window Inserts
Custom inserts fit inside existing frames, adding low-E glass for superior thermal performance. They reduce noise and UV damage too, protecting furniture from fading. As demonstrated in a recent Window Gurus installation, this cut a client’s heating costs by 25% while maintaining the home’s original character.
Your DIY Toolkit: Tools and Materials Checklist
Include a utility knife for trimming materials, measuring tape for accurate cuts, screwdriver set for hardware adjustment, and cleaning rags for surface prep.
The Essentials for Most Projects
Add painter’s tape for masking and a putty knife for smoothing. Keep a flashlight handy for inspecting dark corners where leaks hide.
Specialized Tools for Caulk & Weatherstripping
A caulk gun ensures even application, while a scraper removes old material without damaging frames. For film kits, use a heat gun or hairdryer to shrink plastic taut. A level guarantees straight installation of weatherstripping, preventing gaps that compromise the seal.
Step-by-Step Guide: How to Perfectly Seal a Window Frame with Caulk
Remove old caulk and dirt with a scraper and soapy water.
Step 1: Clean and Prepare the Area for a Lasting Bond
Dry thoroughly with a clean rag. This ensures adhesion; skipping it led to failures in early projects I observed where new caulk peeled within months. For stubborn residue, use rubbing alcohol to prep the surface.
Step 2: Apply a Consistent Bead of Caulk
Cut the tube tip at a 45-degree angle and squeeze evenly along gaps. Work in sections to avoid mess and maintain control. Aim for a 1/4-inch bead that fills the gap without excess. Apply steady pressure on the gun trigger and move at a consistent speed for uniform coverage.
Step 3: Smooth the Bead and Allow for Proper Curing
Tool the caulk with a wet finger or spoon for a neat finish that presses material into cracks. Let it cure for 24 hours before exposure to moisture or temperature extremes. In a Window Gurus job, this step prevented water intrusion during heavy rains and ensured the seal remained flexible through seasonal expansion.
When to Stop Fixing: Is It Time to Replace Your Windows?
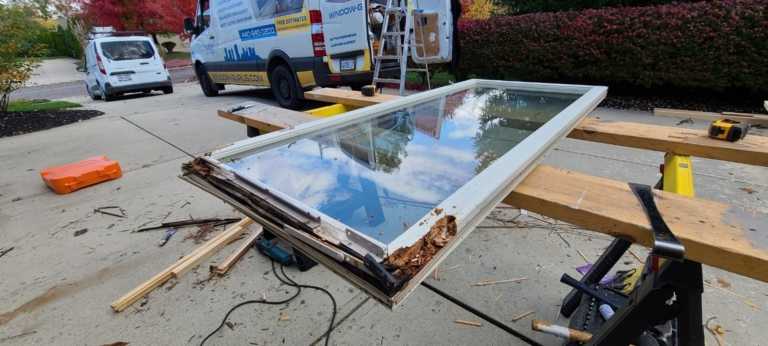
Look for rotting frames that crumble when pressed, persistent fogging between panes indicating broken seals, or difficulty operating sashes due to warped wood.
Key Signs Your Windows Need Replacement
If drafts return despite fixes, or if condensation forms inside double-pane glass, replacement prevents further damage to walls and trim. Shattered or cracked glass that compromises security also demands urgent attention.
The Long-Term ROI of New, Energy-Efficient Windows
Modern energy-efficient window systems with insulated glazing and upgraded seals can cut heat loss dramatically while extending the life of existing frames. But replacement isn’t always required—many homes achieve similar performance through targeted upgrades like energy-efficient double-pane glass restoration, sealing failures with professional window caulking repair services, or restoring deteriorated wood components through structural wood window rehabilitation. If hardware wear is contributing to air gaps or poor closure, window mechanism and balance repair solutions can also restore airtight operation without full replacement.

Understanding the Root Cause: Why Your Windows are Drafty
Gaps at joints where frames meet walls, poor insulation in single-pane designs, or faulty installation allow air entry.
Common Failure Points in Window Construction
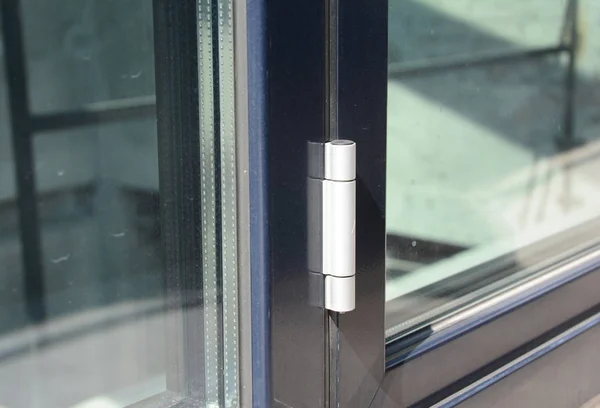
Aluminum frames conduct cold more than vinyl, creating condensation and ice buildup. Broken weatherstripping around sashes and damaged glazing compound on older wooden windows rank among the top culprits I encounter.
The Impact of Age, Settling, and Weather
Homes settle over time, warping frames and opening gaps that weren’t there initially. Extreme weather erodes seals, with UV rays breaking down rubber and caulk. In Ohio’s freeze-thaw cycles, I’ve seen this accelerate issues in untreated windows, where expansion and contraction crack glazing and loosen panes within 10-15 years of installation.
Frequently Asked Questions (FAQ)
Quick answers to common reader questions, drawn directly from real search intents.
Yes, most fixes require basic skills and tools. Start with temporary options like weatherstripping if unsure, and consult pros like Window Gurus for complex cases involving structural damage or full-pane replacement that demands precision.
Five common causes: (1) failed weatherstripping on operable sashes — the seal compresses over 5–10 years and air leaks past; (2) cracked or missing caulk around the exterior frame perimeter; (3) failed IGU seal in double-pane windows (look for fogging between panes); (4) cold air convection currents — even sealed cold glass cools the room air against it; (5) gaps in the rough-opening insulation behind the trim. Locate the source first with a candle test on a windy day before fixing — most homeowners spend money in wrong places.
Five-step fix in priority order: (1) replace failed weatherstripping ($4–$8 per roll, 30 min/window); (2) recaulk exterior perimeter where it shows cracks ($8/tube); (3) install thermal curtains for nighttime heat retention ($30–$60); (4) apply shrink-wrap film for the worst windows ($15–$25 kit, 30 min/window); (5) add a draft snake at the sill ($10 DIY). Total cost for an 8-window home: $80–$200, saves $80–$200/year. If sash itself is failing (warped, broken locks), full window replacement is the only permanent fix.
Three test methods on a windy day or with HVAC running: (1) candle/incense — light it, hold near the closed window perimeter, watch the flame/smoke for movement; (2) infrared thermometer ($25 at hardware stores) — sweep across glass and frame, looking for cold spots; (3) hand test — wet your hand and slowly run it around the frame, you’ll feel cold air on damp skin. Document the leak locations with sticky notes, then prioritize fixes from worst to least.
Four scenarios where replacement (not repair) makes sense: (1) windows are 25+ years old AND show seal failure; (2) frames have visible warping, rot, or sash misalignment; (3) energy bills are 30%+ higher than similar-size homes; (4) you’ve already weatherstripped and caulked but drafts persist. Cost: $400–$900 per vinyl window installed; payback through energy savings is 8–15 years. Combine with utility rebates and federal tax credits for faster ROI.
Three possibilities for new windows feeling cold: (1) center-of-glass temperature — even quality double-pane glass runs 50–55°F on the inside surface when outside is 0°F (normal physics, not a defect); (2) installation error — gap in the rough opening insulation creating air leakage; (3) cold convection — your body senses the cold air falling off the glass even though there’s no actual leak. Real fix: triple-pane upgrade brings center-of-glass to 60–65°F. Aesthetic fix: thermal curtains break the convection currents.