Windows are an essential part of any home—they let in natural light, allow for fresh air, and provide a view of the world outside. However, when the mechanisms responsible for opening and closing them start to fail, it can be both annoying and troublesome. One of the most common issues is when the window hinges become damaged or worn out. Fortunately, fixing them isn’t as complicated as it sounds, and with the right knowledge and tools, you can handle the repair yourself!
In this guide, we’ll walk you through everything you need to know about repairing window hinges, from recognizing the symptoms of damage to performing the actual repair.
Key Takeaways
- 5 warning signs: won’t fully open/close, visible sag, creak/grind, rust or bent parts, draughts around the sash. Fix at signs 1–3 — later means hinge + frame repair.
- Casement quick fix: clean channels with a stiff brush + silicone spray (never WD-40). Replace whole hinge if friction stay rivets are worn ($15–$30).
- Adjustment: hex screw on hinge body, 1/4 turn at a time. CW pulls sash in, CCW lets it sit out. Shim under bottom hinge if no adjustment screws.
- Cost: DIY $10–$30 per hinge + basic tools (under $20). Pro install $80–$150 per window — worth it for tilt-and-turn hardware or damaged frames.
- Don’t: straighten bent arms (will refail), use WD-40 (attracts dust), or skip support when removing hinges (sash will drop and crack glass).
Understanding the Importance of Window Hinges
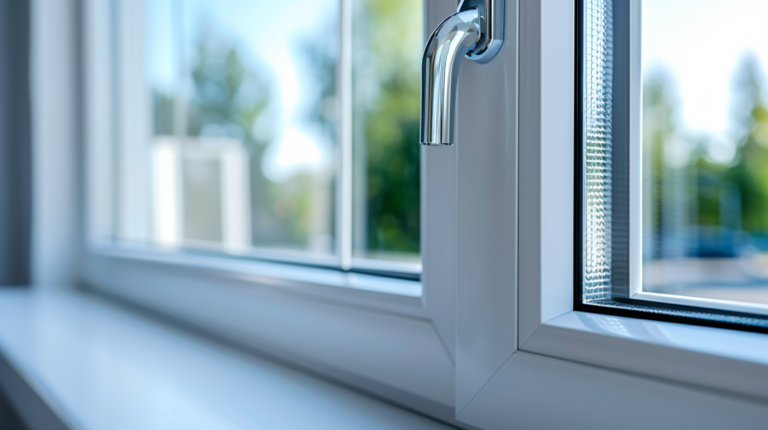
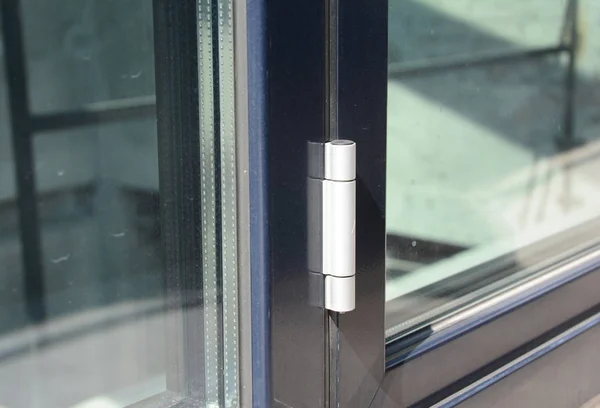
The type of hinge used will vary depending on your window style—whether it’s a casement, awning, or another design. When the hinges are functioning well, the window operates with ease. But when they begin to fail, you’ll start noticing problems like difficulty opening, squeaks, or even total malfunction. In such cases, repairing or replacing the hinge is essential to maintaining both function and security. If you’re not confident handling repairs on your own, a trusted window contractor can inspect and service your windows professionally.
- Supports Window Movement: Hinges allow the window to pivot properly without becoming loose.
- Ensures Security: Working hinges hold the window firmly in place, offering protection for your home.
- Preserves Aesthetics: A well-maintained hinge ensures the window remains neat and aligns properly in the frame.
Common Signs Your Window Hinges Need Repair
- Difficulty Opening or Closing: If you feel like you’re wrestling with the window, it’s a clear sign that the hinges are either misaligned or worn out.
- Squeaking Sounds: If your window makes a high-pitched noise every time you open it, chances are your hinges need lubrication or maintenance.
- Visible Wear and Tear: If you spot cracks, rust, or bent hinges, they are likely beyond repair and need to be replaced.
- Loose or Wobbly Hinges: If the hinges seem to move excessively or rattle when you operate the window, they’ve lost their integrity and need fixing.
The sooner you address these issues, the better it will be for your windows—and your wallet!
Tools You’ll Need for Repairing Window Hinges
- Screwdriver: A flathead or Phillips screwdriver, depending on the type of screws used in your hinges.
- Drill: Helpful for re-aligning holes or replacing screws.
- Lubricant (WD-40 or similar): Essential for loosening stiff or squeaky hinges.
- Replacement Hinges: If your hinges are too damaged to repair, make sure to purchase the correct replacement hinges.
- Hammer: If a hinge is particularly stuck, gently tap it with a hammer to loosen it.
- Level: A must if you’re installing or adjusting hinges to ensure everything is perfectly aligned.
Having these tools at your disposal will make the repair process quicker and more efficient.
Step-by-Step Guide to Repairing Window Hinges
- Assess the Damage. Before you start, take a good look at the hinge to determine if it’s repairable or if a replacement is needed. Check for rust, bent parts, or excessive wear.
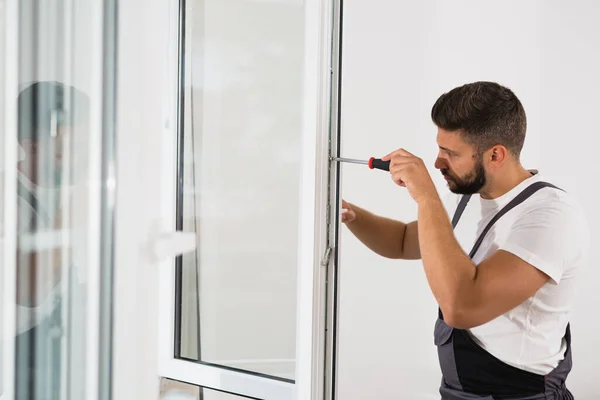
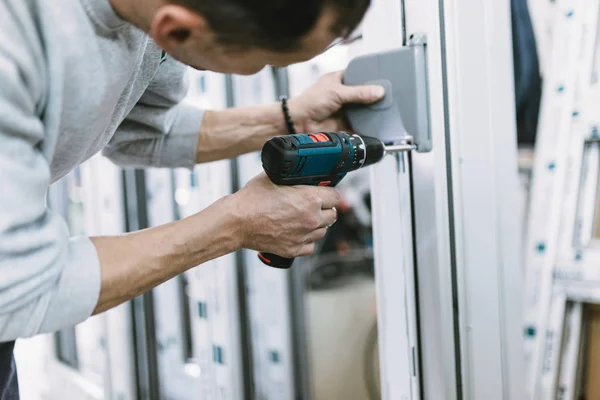
- Remove the Window from the Frame. To get access to the hinges, you’ll likely need to remove the window from its frame. This can usually be done by unscrewing the hinges with a screwdriver.
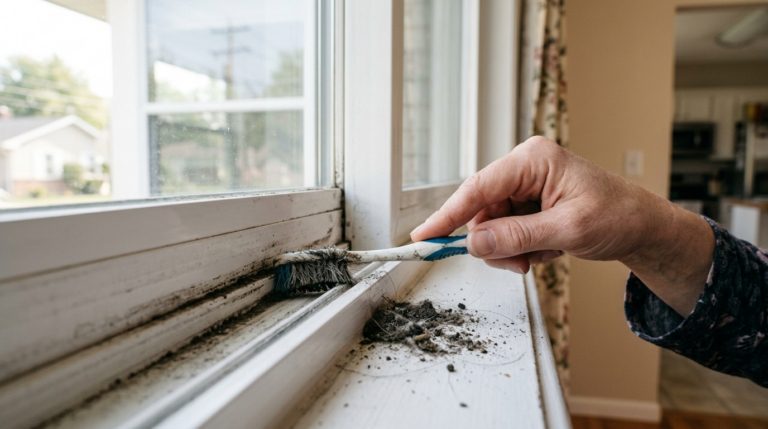
- Clean and Lubricate the Hinges. Once the hinges are accessible, clean them thoroughly to remove any dirt, dust, or debris. Apply a lubricant like WD-40 to ensure the hinges move smoothly without friction.
- Replace the Hinge (if necessary). If the hinge is beyond repair, remove it carefully and install a new one. Make sure the new hinge matches the existing holes and fits securely in place.
- Reinstall the Window. Once the hinge has been repaired or replaced, reinstall the window into its frame. Tighten the screws, making sure everything is secure, and check that the window opens and closes properly.
- Test the Window. Finally, test the window several times to make sure it operates smoothly. If the window still sticks or squeaks, you may need to adjust the hinge further.
How to Replace Broken or Damaged Window Hinges
- Get the Right Replacement: Measure the old hinge carefully to ensure the replacement fits.
- Remove the Old Hinge: Unscrew the damaged hinge and remove it from the window.
- Install the New Hinge: Attach the new hinge in place, making sure it aligns with the screw holes.
- Reinstall the Window: Once the hinge is in place, reattach the window and ensure that it opens and closes without any issues.
Replacing window hinges doesn’t have to be expensive. Most hardware stores offer reasonably priced options that will restore your window’s functionality.
Fixing Loose Hinges and Preventing Further Damage
- Tighten the Screws: Often, all it takes is tightening the screws to get the hinges back in place.
- Reinforce the Frame: If the screw holes are stripped or too large, you may need to reinforce the frame by using larger screws or filling the holes with a wooden dowel.
Preventing future damage requires regular maintenance. Lubricate your hinges and inspect them periodically to make sure they remain secure.
What to Do When Window Hinges Won’t Close Properly
- Look for Obstructions: Ensure there’s nothing blocking the hinges or preventing the window from closing.
- Adjust the Alignment: If the hinge is misaligned, loosen the screws, reposition the hinge, and retighten it.
- Lubricate the Hinges: Apply a lubricant to reduce friction and help the window close smoothly.
How to Maintain and Extend the Lifespan of Window Hinges
- Clean the Hinges Regularly: Dirt and dust can wear down your hinges over time, so it’s a good idea to clean them frequently.
- Lubricate the Hinges: Every six months, apply a fresh coat of lubricant to keep things moving smoothly.
- Inspect for Damage: Periodically check for rust, cracks, or loose screws. Addressing small issues early can prevent bigger problems later on.
Professional vs DIY Window Hinge Repairs
- DIY Repairs: A great option if you’re on a budget and feel confident in your ability to fix things. However, it can take time and requires the right tools.
- Professional Repairs: Quick and efficient, but may be more expensive. A professional is also the best option for more complicated issues.
If the problem is minor and you’re up for it, DIY can save you money. But if the repairs are more complex, don’t hesitate to hire an expert.
Common Mistakes to Avoid When Repairing Window Hinges
- Over-tightening Screws: Tightening the screws too much can damage the hinge or window frame.
- Neglecting to Clean the Hinges: Skipping the cleaning step can trap dirt and lead to more friction and wear.
- Ignoring Safety: Always wear gloves and safety goggles when handling tools to avoid injury.
The Benefits of Regular Window Hinge Maintenance
- Cost Savings: Regular checks and minor repairs prevent costly replacements down the road.
- Improved Security: Secure hinges ensure that your windows stay locked, keeping your home safer.
- Energy Efficiency: Well-maintained windows help keep your home insulated, which can reduce heating and cooling costs.
Expert Tips for Ensuring Your Windows Work Like New
- Lubricate Hinges Twice a Year: A simple application of lubricant can make a huge difference.
- Check Alignment: Misaligned windows put strain on the hinges and can cause premature wear.
- Use Weather Stripping: This keeps moisture and debris away from the hinges, extending their lifespan.
Frequently Asked Questions
Quick answers to common reader questions, drawn directly from real search intents.
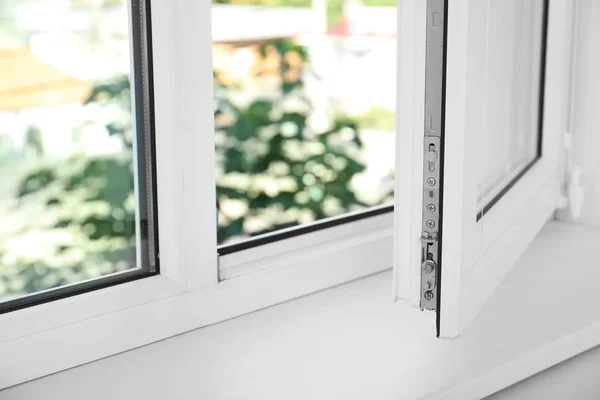
Casement hinges (the scissor-arm style) usually fail at the friction stay or the corner pivot. Open the window fully and check for play in the arm — if it wobbles, the rivets are worn and the whole hinge needs replacing ($15–$30 each). For sticky operation, clean grit out of the channels with a stiff brush, then apply silicone spray (NOT WD-40 — it attracts dust). Tighten any visible screws while you’re there.
Most modern hinges have an adjustment screw on the side or top of the hinge body — a hex key (usually 4mm or 5mm) turns it. Clockwise pulls the sash toward the frame, counterclockwise lets it sit out. Adjust 1/4 turn at a time, close the window, and check the gap. If your hinges have no adjustment screws, fix alignment by shimming under the bottom hinge with a thin washer.
Open the window, support the sash with a helper or a board, then unscrew the broken hinge starting with the screws on the sash side. Lift the sash out of the frame hinge. Match the new hinge by length and screw-hole pattern (snap a photo before buying). Reinstall in reverse, leaving the screws slightly loose until the sash is hung, then tighten. Total time: 20–40 min per hinge.
Five tells: (1) the window won’t open or close fully; (2) it sags visibly when open; (3) you hear a metallic creak or grinding when operating it; (4) visible rust, bent arms, or loose screws on the hinge; (5) draughts around the closed sash because alignment has shifted. Catch issues at signs 1–3 — by 4–5, you’re looking at full hinge replacement plus possible frame repair.
DIY: $10–$30 per hinge for residential vinyl/wood casements, $30–$70 for premium friction stays. Most windows have 2 hinges. Tools needed are basic: hex keys, screwdrivers — total under $20 if you don’t have them. Professional install: $80–$150 per window including labor and hardware. Calling a pro makes sense for tilt-and-turn hardware or when the frame itself is damaged.
A bent arm — no, replace it. Steel arms aren’t designed to be straightened and will fail again under load. A popped-off pivot pin can sometimes be reseated by aligning the arm and tapping the pin back in with a rubber mallet, but if the hole is enlarged, swap the hinge. For aluminum boat or RV-style window hinges that pop, use marine-grade replacement hardware to avoid corrosion seizing the next set.

Ready to fix your windows? Get a free quote in 30 seconds.
Family-owned, licensed & insured. Most quotes delivered the same day.