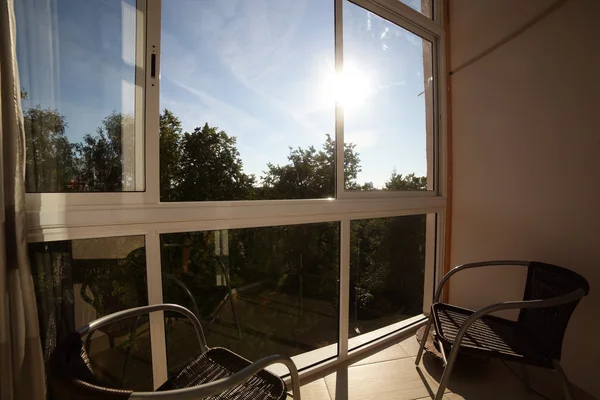
Window screens do quiet, thankless work: they keep bugs out, filter pollen and road dust, and shade the glass a little in summer. The catch is that everything they catch builds up on the mesh, and that grime washes right back onto your glass with the next rain. Cleaning them is easy, but the mesh is more delicate than it looks, so technique matters more than muscle.
This guide covers the tools, an in-place method for screens you cannot remove, a deep clean for heavy pollen and mildew, and the mistakes that put a hole straight through the mesh. If the glass behind the screen also needs work, our overview of glass repair is a good next stop.
Quick answer: To clean window screens, take them out and lay them flat, then dry-brush or vacuum off loose dust. Pre-rinse, brush on warm water with a little dish soap or a 1:1 vinegar mix, let it sit, and scrub gently in sections with almost no pressure. Rinse well and let them dry fully before putting them back.
What You Need and How Often to Clean Them
You do not need special equipment, and you should skip anything aggressive. The whole job rests on soft tools and a gentle solution, because the mesh will stretch or tear under a stiff brush or a pressure washer. A few drops of dish soap in warm water handles ordinary grime, and a 1:1 mix of white vinegar and water cuts the cloudy film that builds up on screens near a kitchen or a busy road.
Twice a year is the baseline, usually a spring clean once the pollen settles and an autumn clean before the screens come out for winter. Homes near trees, gravel roads, or heavy traffic do better with a quick pass three or four times a year. Clean screens are not just about looks: they restore airflow, let in noticeably more light, and stop the layer of pollen that bothers allergy-prone households.
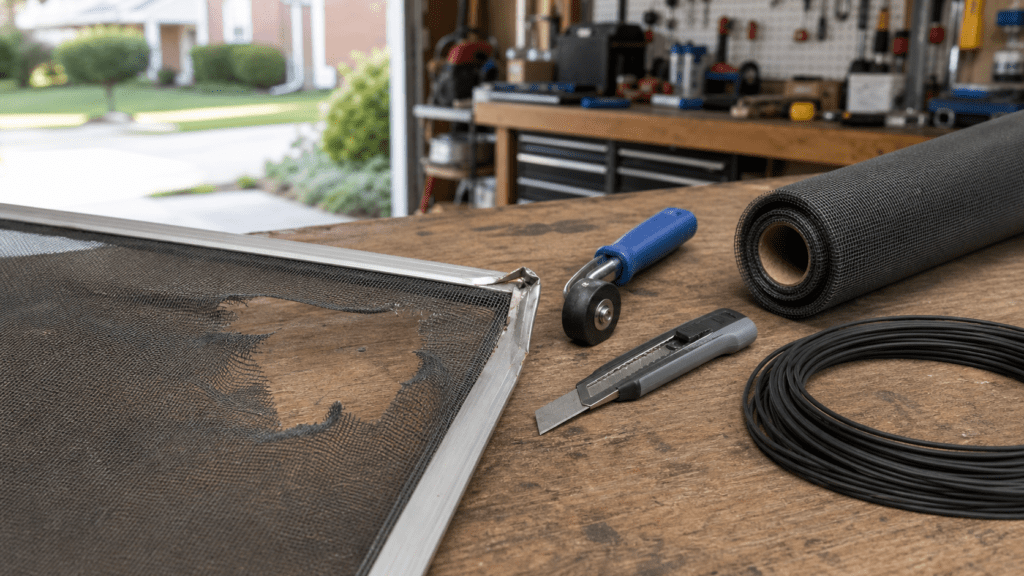
Here is the short kit that covers most homes:
- A soft brush or a vacuum with a brush attachment for the dry pass.
- Microfiber cloths and a soft sponge for wiping the mesh.
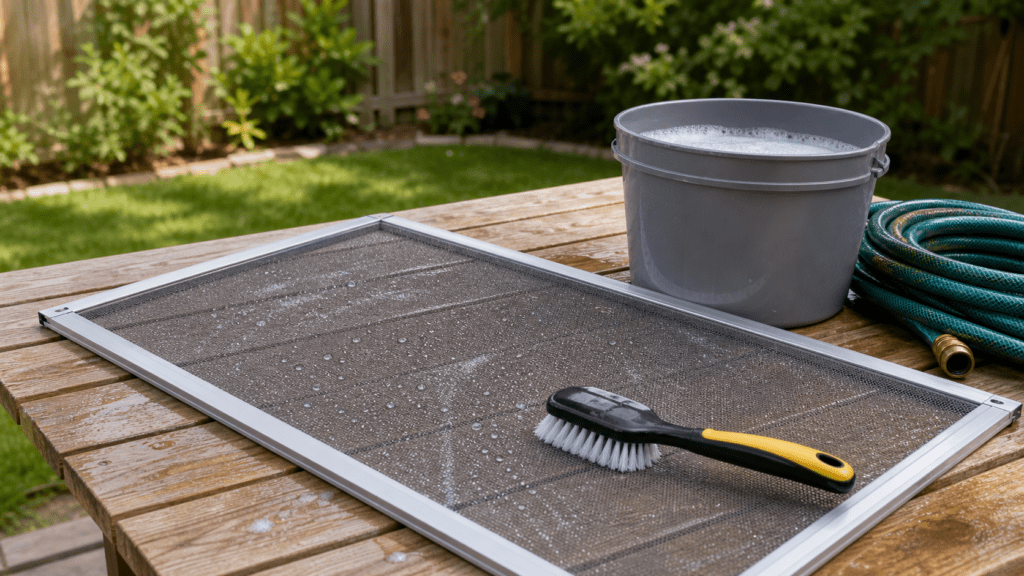
- A bucket of warm water with dish soap, or a 1:1 vinegar mix.
- A lint roller for pet hair and fine dust on screens you leave in place.
- A hose or spray bottle for rinsing, plus an old toothbrush for the frame corners.
Know Your Screen Type Before You Scrub
Not every screen takes the same handling, and matching your pressure to the material is the difference between a clean screen and a torn one. Standard fiberglass mesh is the most common and the most forgiving, but it goes brittle after years of sun, so older fiberglass needs the lightest touch. Aluminum mesh is sturdier and holds its shape better, though it dents and creases if you lean on it.
Specialty screens ask for extra care. Pet-resistant mesh is thicker and tougher, so it can take a firmer brush, while solar or sun screens use a dense weave that traps far more dust and benefits from a longer soak rather than harder scrubbing. If you are not sure what you have, treat it as fragile fiberglass until you know otherwise.
A quick look at the frame helps too. A bent frame or a loose rubber spline, the cord that holds the mesh in its channel, means the screen is due for repair, and scrubbing it will only finish the job. Sort the fragile ones from the solid ones before you start, and you will not be surprised halfway through.
How to Clean Window Screens, Step by Step
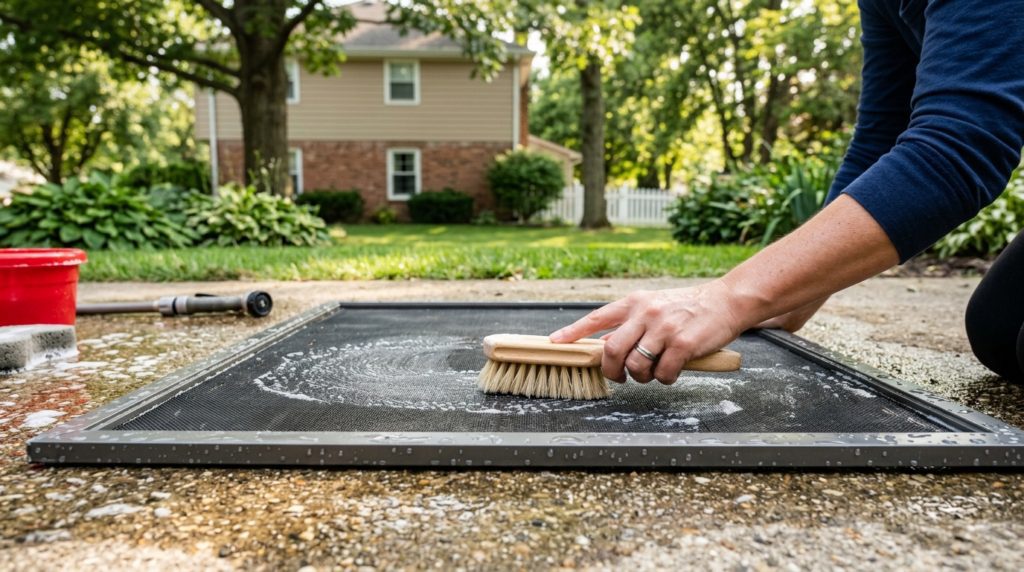
The cleanest results come from pulling the screens and washing them flat, where you can reach both faces and let the solution do the work. Lay down towels first on a patio, driveway, or garage floor to cushion the frames and soak up the runoff. Work one screen at a time so nothing gets mixed up or stepped on.
The order is what protects the mesh. Always lift the dry dust off before water touches it, because scrubbing wet grit drives it into the weave and can score the frame. Let the solution sit so it loosens the grime instead of relying on pressure you should not use.
- Remove the screens and lay them flat on a towel-covered surface where you can reach both sides.
- Dry-brush or vacuum both sides to lift loose dust and pollen before any water.
- Pre-rinse with plain water to wash off surface grit.
- Apply a mild solution and let it sit ten to fifteen minutes to loosen the dirt.
- Scrub gently in small sections with a soft brush, using almost no pressure.
- Rinse thoroughly until no soap film is left behind.
- Dry completely before returning each screen to its own window.
Cleaning Screens Without Removing Them
Sometimes pulling the screens is not practical, whether they are painted into the frame, fixed on an upper story, or simply too many to take down in one afternoon. You can still get a real clean in place, it just calls for a drier, lighter approach so soapy water does not run down the siding and stain it.
Start with the vacuum and brush attachment to clear the bulk of the dust, then run a lint roller over the mesh to grab pet hair and pollen that the brush misses. For the wash, lightly mist the screen with your solution rather than soaking it, and wipe section by section with a damp microfiber cloth, supporting the back of the mesh with your other hand so you are not pushing it out of the frame.
Keep a dry towel along the bottom of the window to catch drips, and finish by wiping the sill and frame. For second-story screens, resist the ladder-and-bucket routine: a soft brush on an extension pole does the job from the ground far more safely.
Deep-Cleaning Pollen, Mildew, and Hard-Water Spots
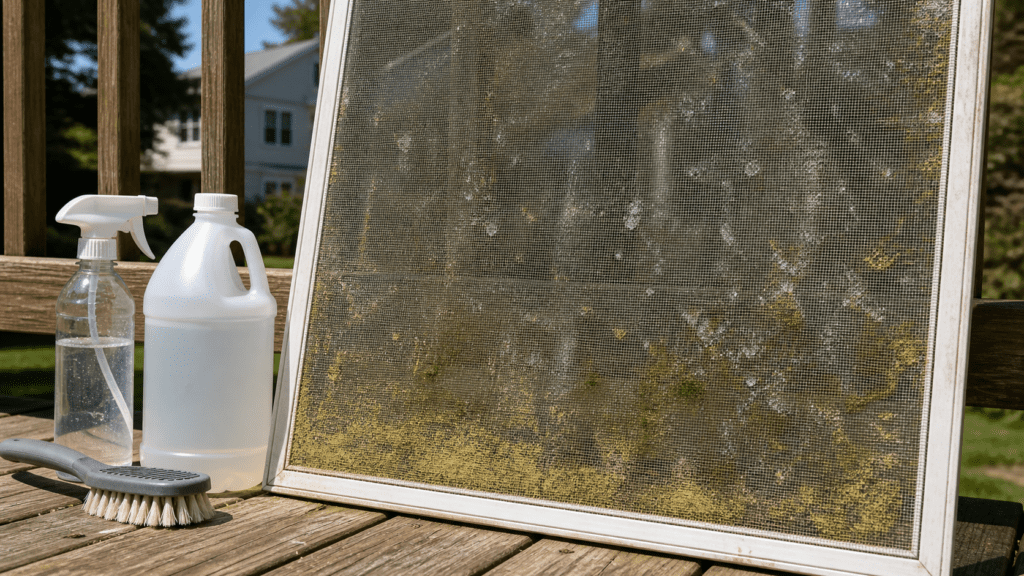
Some screens need more than a wipe, especially in Ohio. Spring coats everything in a yellow film of tree and grass pollen, cottonwood fluff clogs the weave near older neighborhoods, and a humid Midwest summer can leave a screen spotted with mildew if it stayed damp. These call for a soak, not more scrubbing.
Lay the screen flat and let your solution sit on it for a full fifteen minutes to soften the buildup before you touch it with a brush. For mildew, lean on the vinegar mix rather than soap, since the acidity kills the spores and clears the musty smell, then rinse well. Hard-water spots, common from sprinklers clipping the mesh, respond to the same warmed-vinegar treatment you would use on glass.
Whatever the buildup, let the soak and the solution do the lifting. If a screen is so caked that it needs real force to come clean, that force is exactly what tears tired mesh, and it is usually a sign the screen is closer to replacement than people expect.
Mistakes That Wreck a Screen
Most ruined screens are not worn out, they are cleaned to death. The mesh is thin and the frame is light, so the very habits that feel thorough are the ones that do the damage. Run through this short list before you start, because every item here ends with a screen you have to replace instead of rinse.
None of it is about working harder. It is about being gentle and patient with a delicate part.
- Scrubbing too hard. Heavy pressure stretches and tears the mesh, and fiberglass tears the easiest.
- Using bleach or ammonia. Harsh chemicals degrade both the mesh and the frame finish.
- Reaching for a pressure washer. It bends frames and blows the mesh right out of its spline.
- Skipping the dry pass. Scrubbing dry grit grinds it deeper and scratches the frame.
- Reinstalling them wet. Trapped moisture breeds the mildew you just cleaned off.
Drying, Labeling, and Reinstalling
The finish line is where two easy mistakes happen. The first is rushing a wet screen back into the window, which seals damp mesh against the frame and starts mildew within days. Stand the screens upright or lay them flat in the shade and let them dry completely, top and bottom, before they go anywhere.
The second is losing track of which screen belongs where. Screens are cut to each opening and are rarely interchangeable, so a screen from one window often will not seat cleanly in another. As you remove them, mark the frame edge with a piece of tape and a number, or photograph them in place first, and reinstalling becomes a two-minute job instead of a guessing game.
When you slot each one back, check that it seats fully in the track and the latches or tension springs hold it snug. A screen that rattles or sits proud of the frame will let bugs past and work loose in the wind, so it is worth the extra few seconds to confirm a clean fit. While the glass is exposed, it is also the ideal moment to give it a streak-free clean.
When a Screen Needs Repair, Not Cleaning
Cleaning fixes dirt, not damage, and at some point a screen is past saving. Mesh that has gone gray and brittle, a tear or a stretched bulge, a bent frame, or a spline that keeps popping out are all signs the screen needs re-screening rather than another wash. Forcing a brush across worn mesh usually just opens a new hole.
On a lot of Columbus homes we see fiberglass mesh that has gone brittle and gray on the west-facing windows, where years of afternoon sun bake it. Once it is that far gone, cleaning only pushes a finger through it, and a fresh screen is the real fix.
Re-screening is inexpensive next to a whole window and keeps the original frame, so it is rarely worth limping along with damaged mesh. If you are weighing whether a screen, or the window behind it, is worth repairing or replacing, a quick assessment settles it faster than guessing.
Screens or Glass Giving You Trouble?
If a screen is torn, the frame is bent, or the window behind it sticks or fogs, a quick look tells you whether it is a simple re-screen, a hardware fix, or something in the glass. There is no sense fighting a screen that has already reached the end of its life.
Book a free, no-pressure window and screen assessment from our Columbus-area team and get a straight answer on repair versus replacement.
FAQ: Cleaning Window Screens

Ready to fix your windows? Get a free quote in 30 seconds.
Family-owned, licensed & insured. Most quotes delivered the same day.