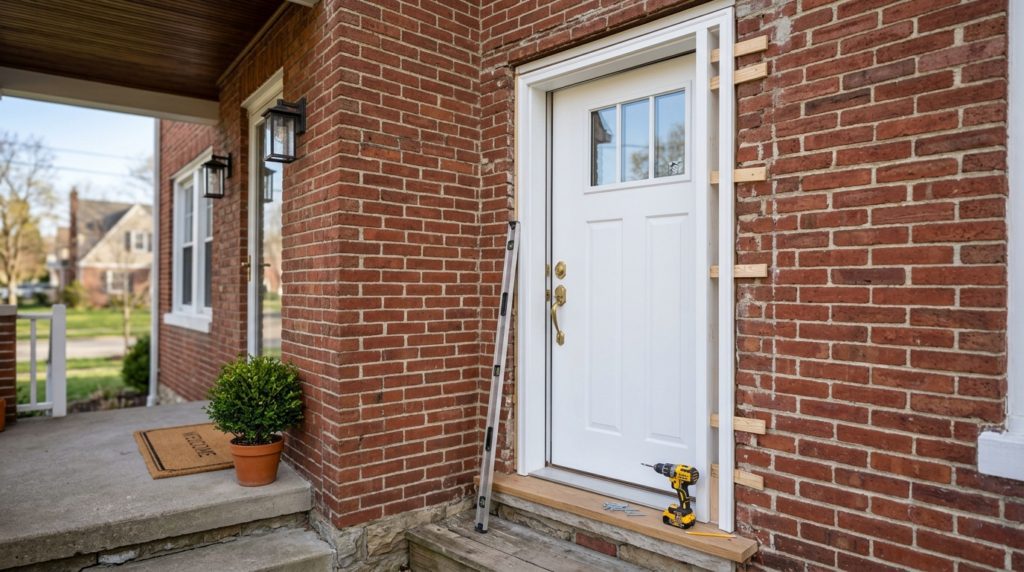
A front door does more than greet visitors. It carries the lock that protects the house, the weatherstripping that keeps Ohio winters outside, and the threshold that sheds rain away from the floor. Hung right, it swings true, latches with a soft click, and seals tight against a January wind. Hung wrong, it sticks, drafts, and lets water creep into the framing.
This guide walks through the whole job: removing the old unit, squaring the opening, setting a sill pan, plumbing and shimming the new door, sealing it against weather, and fitting the lock. It is an intermediate project, and the gap between a clean result and a callback is almost all in the prep. If you would rather hand it off, our team handles door installation across Columbus and Cincinnati.
Quick answer: To install a front door, remove the old unit, clean and square the rough opening, and set a sloped sill pan. Tilt the new prehung door into place, center it, then plumb and shim the hinge side and fasten it. Square the strike side, foam the gaps, seal the trim, and fit the lock.
Is This a Job You Should Take On?
Hanging an exterior door sits at the harder end of weekend projects. It is not the carpentry that trips people up so much as the patience: a door a sixteenth of an inch out of plumb will drag or fail to latch, and you only find out after everything is fastened. Plan on most of a day, and line up a second pair of hands for the lifting and holding.
The first real decision is prehung versus slab. A slab is just the door panel with no frame, hinges, or bored holes, so hanging one means mortising the hinges and boring the lock into exact spots, fussy work best saved for when the existing frame is dead square and sound. A prehung unit arrives as the door already mounted in its own frame with the hinges set, so you install it as one piece. For a front entry on a standing house, prehung is almost always the right call, because the frame is the hard part and a factory frame is built true. Units come in steel, fiberglass, and wood, and the material changes the upkeep more than the install, so compare your entry door options before you buy.
Know your limits before you start. If the opening is badly out of square, the subfloor is soft, or the wall is brick or stone, the prep crosses into structural work. Those jobs reward experience, and a botched seal on an entry door shows up as a draft and a water stain within a season. When the opening needs real surgery, our installation crew can take it from the framing out.
What You Need to Install a Front Door
Gather everything before the old door comes off, because an open doorway is not something you want to leave half-done while you hunt for a tool. None of this is exotic. Most of it already lives in a homeowner’s kit, and the few specialty items, like a sill pan and low-expansion foam, are inexpensive and sold at any home center.
The two tools that decide the outcome are a long level and a generous supply of shims. A 4-foot or 6-foot level reads plumb across the whole jamb instead of a short stretch, and shims are how you fine-tune the frame to that reading. Skimp on either and the door fights you for years.
- A 4-foot or 6-foot level to check the jambs for plumb in both directions.
- Wood or composite shims to true up the frame behind every fastener.
- A drill with 2.5-inch and 3-inch screws to fasten the jambs and strike plate into the framing.
- A sloped sill pan and exterior sealant to drain water back outside the threshold.
- Low-expansion foam and exterior caulk to insulate and seal the gaps.
- A pry bar, utility knife, and reciprocating saw to remove the old door and trim.
- Flashing tape and a measuring tape to lap the water barrier and confirm the opening size.
How to Install a Front Door, Step by Step
The order below is built around one idea: water and air follow gravity and pressure, so you seal from the bottom up and you square the frame before you trust a single screw. Work one side at a time, check plumb after every few fasteners, and resist the urge to drive everything tight until the reveal looks even all the way around.
The step most DIYers rush is the opening prep, and it is the one that makes or breaks the rest. A frame set into a true, dry, flashed opening almost installs itself. A frame forced into a crooked one never comes right.
- Remove the old door. Unscrew or pry the old unit and frame out, then pull every leftover fastener and strip the trim back to the framing.
- Inspect and square the opening. Clear the debris, probe the sill for soft wood, and check the opening for level, plumb, and square, shimming or shaving the framing until it is true.
- Install a sill pan. Set a sloped sill pan in a bead of sealant so any water that reaches the threshold drains back outside instead of into the subfloor.
- Set and center the door. Tilt the prehung unit into the opening, rest it on the sill pan, and center it side to side.
- Plumb and shim the hinge side. Check the hinge jamb for plumb in both directions, slip shims behind each hinge, and drive the screws into the framing.
- Square the strike side. Close the door, set an even reveal and equal weatherstripping compression, then shim and fasten the strike jamb.
- Insulate and seal. Fill the gaps with low-expansion foam, caulk the exterior trim, and adjust the threshold sweep.
- Fit the lockset and deadbolt. Install the handle and deadbolt, then anchor the strike plate with 3-inch screws into the framing.
The Rough Opening Decides Everything
Every problem an installed door can have, the drafts, the sticking, a lock that misses the strike, traces back to the opening it sits in. A prehung frame is built square at the factory. If you set that square frame into a crooked hole and screw it down to match, you have just built the crookedness into the door. So the rough opening gets trued first, every time.
This matters more in older Columbus and Cincinnati neighborhoods than almost anywhere. Century homes in places like German Village and Clintonville have settled for decades, and their door openings often drift out of square by a noticeable margin. Check the diagonals with a tape; if they differ by more than a little, the opening has racked and needs shimming or planing before the door goes in. Plumb and level the sill, the head, and both jambs with the long level, not by eye.
On older homes around Columbus, the opening is rarely square when we pull the old slab. A door that drags or will not latch a year after a DIY install almost always went into a racked frame that was never trued first.
While the opening is bare, push a screwdriver into the sill and the bottom corners of the jambs. If the wood is soft or spongy, water has been getting in, and dropping a new door onto rotted framing only hides the problem until it spreads. Sort the rotted sill or framing out first; a new door is only as solid as what it is fastened to.
Why the Sill Pan Is the Step You Cannot Skip
The sill pan is a shallow, sloped tray that sits under the threshold, catches any water that sneaks past the weatherstripping, and drains it back outside. It is cheap, it takes ten minutes, and it is the single step that separates a door that lasts twenty years from one that rots its own frame. Most DIY installs skip it, and most water-damaged entries trace back to that choice.
In Ohio’s climate the pan earns its keep through the freeze-thaw cycle. Wind-driven rain and melting snow push moisture toward the threshold all winter. Water that collects in an unprotected opening soaks into the subfloor, then freezes and expands on the next cold night, prying joints apart a little more with every swing between thaw and freeze. A sloped pan gives that water a way out before it ever has the chance to sit and freeze.
Bed the pan in a continuous bead of exterior sealant, lap the flashing tape over the water-resistive barrier so the layers shed water like shingles, and make sure the pan slopes toward the exterior. The back dam at the inside edge is what stops water from running indoors, so do not flatten it. Get this layer right and the rest of the seal has a fighting chance; get it wrong and no amount of caulk on top will save it.
Sealing, Insulating, and Weatherstripping
Once the door is fastened and square, the gap between the jamb and the framing has to be insulated without distorting the frame. This is where a common shortcut backfires. Standard expanding foam pushes outward with surprising force as it cures, and it can bow the jamb inward enough that the door suddenly will not latch. Use low-expansion (door-and-window) foam only, and fill the cavity in light passes rather than one heavy bead.
On the outside, run a continuous bead of exterior-grade caulk where the brick molding or trim meets the siding, leaving the very bottom open so any water behind the trim can escape. Inside, the foam handles air infiltration. Together they stop the drafts that make an entry feel cold in January and run up the heating bill, the same logic behind a well-sealed, energy-efficient window.
The threshold is the last seal to dial in. Most modern sills have an adjustable cap you raise or lower with a few screws until the door sweep just kisses it. A quick field test: close the door on a dollar bill and pull; it should drag slightly without tearing. Too loose and you have an ankle draft, too tight and the sweep wears out fast. Walk the test across the width of the sill, since one corner is often higher than the other.
Locks, the Strike Plate, and the Door Glass
A new door is only as secure as the strike plate behind the deadbolt, and this is the detail most installs get wrong. The short screws that come in the hardware box bite only into the soft jamb, which splinters under a kick. Swap them for 3-inch screws that reach through the jamb into the wall framing. The same upgrade on the top hinge keeps a heavy door from sagging over time.
Fit the handle set first, then the deadbolt, following the template that comes with the lock so the bores line up with the strike. Test the throw with the door both open and closed; if the bolt only turns freely with the door open, the strike plate needs to shift a hair. A deadbolt you have to lift or lean on to lock is a sign the door has settled or the strike is misaligned, not that the lock is bad.
If your new door has a decorative glass panel or sidelights, remember those are sealed insulated units, the same as a window. They can lose their seal and fog up between the panes years down the road. That haze is not dirty glass and it does not wipe away; it means the seal has failed and the glass unit needs replacing, which is a far smaller job than swapping the whole door.
Mistakes That Cause Drafts and Sticking
Almost every front-door install that goes wrong fails for one of a handful of reasons, and all of them are avoidable. None are about strength or speed; they are about checking your work before the screws go tight. Run through this list before you commit, because each item trades a few minutes now for a problem that is hard to fix later.
The thread running through them is patience with the prep and the seal. A door is forgiving of a slow installer and brutal toward a rushed one.
- Setting the door in an out-of-square opening so it drags, gaps, and never latches cleanly.
- Skipping the sill pan, which invites the water damage and freeze-thaw rot the pan is there to prevent.
- Using standard expanding foam, which bows the jamb until the door will not close.
- Fastening before the frame is shimmed, letting the jamb flex out of plumb as the screws bite.
- Leaving the factory hardware screws in the strike plate, a weak point an intruder can defeat with a shove.
- Forgetting to caulk the exterior trim, or sealing the bottom shut so trapped water cannot drain.
Ready for a Door That Seals Right?
Installing an entry door well takes the right prep, a square opening, and a seal that holds up to Ohio weather. If the opening is out of square, the framing is soft, or you simply want it done once and done right, it is worth bringing in a crew that hangs doors every week.
Book a free, no-pressure in-home assessment and get a straight answer on your opening and the right door for it. Our in-house technicians hang entry and patio doors across the Columbus and Cincinnati metros every week, so the prep that makes a door last gets done right the first time.
FAQ: Installing a Front Door

Ready to fix your windows? Get a free quote in 30 seconds.
Family-owned, licensed & insured. Free, no-obligation quotes.