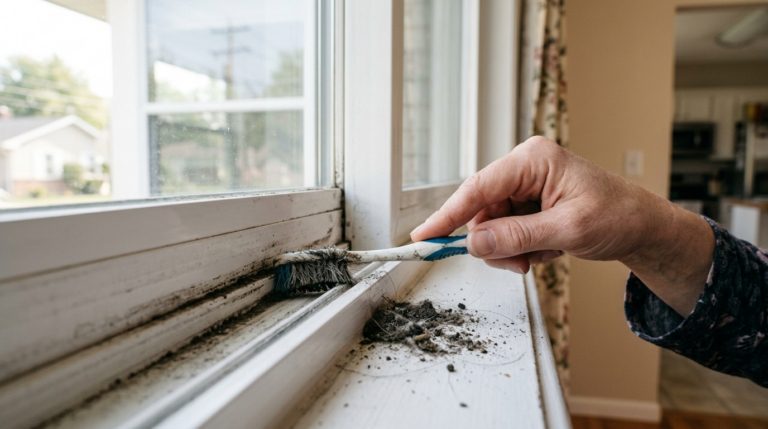
A window sash is the moving frame that holds the glass, the part you push up and down on a double-hung window. When it warps, rots at the bottom rail, fogs up, or stops staying put, you can often swap just that piece instead of tearing out the whole window. Done right, a sash replacement restores a smooth glide and a tight seal for a fraction of the disruption of a full unit.
This guide covers the two situations you are likely facing: a quick tilt-out swap on a modern window, and a full sash kit with new jamb liners on an older one. It walks through measuring, removing the old parts, fitting the new sash, and the one question to settle first, whether the problem is really the sash at all. If the frame around it is sound but the moving parts are worn, a sash and hardware repair is usually the smart call.
Quick answer: To install a replacement window sash, pry off the interior stops, remove the old sash and any cords, then take out the parting bead. Snap in the new jamb liners, set the upper sash into the balances first, then the lower sash, reinstall the stops, and test the glide.
What a Sash Replacement Kit Actually Includes
Not every sash job uses the same parts, and knowing what you are buying saves a wasted trip. At its simplest, a replacement is a single new sash that drops into the channels you already have. That works when the existing balances and liners are fine and only the glass-holding frame has failed. More often, especially on tired windows, you order a full kit that renews the moving system from scratch.
A complete kit rebuilds how the window slides, not just the panel you see. It saves you from fitting a fresh sash into worn tracks that will only let it rattle or stick again. The pieces below are what typically come in the box.
- The sashes themselves — one or both, glazed and ready, sized to your opening.
- Vinyl jamb liners that line each side jamb and carry the sash up and down.
- Liner clips and fasteners that hold those liners tight to the frame.
- Spring balances or a clutch system built into the liners so the sash stays where you leave it.
- Weatherstripping at the meeting rail and edges to cut drafts once the new sash is in.
Is It the Sash, the Glass, or the Whole Window?
Before you order anything, pin down what has actually failed, because three different problems look similar from across the room. If the glass is foggy or has a milky film between the panes but the sash frame is solid, the sash is fine and the sealed glass unit has lost its seal. That is a glass job, not a sash swap, and resealing or replacing the insulated glass keeps your existing sash in place.
The harder call is the frame around the sash. Push a screwdriver into the sill and the bottom of the side jambs; if the wood is soft or punky, a new sash will not save it. Water that gets past a tired seal in an Ohio winter freezes, expands inside the joint, and works the wood apart from the inside, so rot usually starts low and hidden. When the jambs are rotted or the opening has dropped out of square, a full window replacement is the lasting fix.
That leaves the case where a sash swap genuinely makes sense: the frame is sound and plumb, but the sash itself is warped, drafty, cracked, or it slams shut because the balances are shot. Here you keep the good frame and renew the part that moves, which is faster, cleaner, and easier on the wall.
What You'll Need
None of this is specialty gear, and most of it is already in a basic toolbox. The job is less about muscle than about working slowly so you do not crack a stop or a jamb you meant to keep. Gather everything first, because once the old sash is out you do not want to hunt for a screwdriver with the window open to the weather.
Have the new sash or kit on hand and confirmed to fit before you remove a single part. The short list below covers a standard swap.
- A utility knife to score the paint and caulk along each stop.
- A stiff putty knife and a flat pry bar to ease off the stops and parting bead.
- A slotted screwdriver and a drill for pulleys, clips, and pilot holes.
- A tape measure and a level to size the opening and check it is square.
- Galvanized nails and a caulk gun to refasten the stops and seal the edges.
How to Measure for a Replacement Sash
A sash that is even slightly off will bind, leak, or refuse to lock, so the measuring step decides whether the rest of the job goes smoothly. Measure the width from the inside face of one side jamb to the other, and take that reading at the top, middle, and bottom of the opening. Old frames rack over time, so use the narrowest of the three numbers to be safe.
For height, measure from the sill up to the head jamb, again in a few spots, since a settled house rarely leaves a perfect rectangle. Write down which measurement came from where, and note whether your window tilts in or rides in fixed liners, because kits are ordered by both size and balance type. When in doubt, our walk-through on measuring a window for replacement covers the same readings in more detail.
If you are buying a manufacturer kit, follow their ordering chart exactly rather than rounding. A sash built a quarter inch generous will not seat in the liners, and one built short will let cold air pour through the gap all winter.
How to Install a Replacement Window Sash, Step by Step
The order matters more than speed here. Clear the old parts in sequence so you do not snap a stop or drop a weight you needed, then build the new system from the liners out. Work on one window at a time, and keep a drop cloth and a dry rag handy in case the opening sits bare for a few minutes.
The step people rush is the frame inspection in the middle, and it is the one that tells you whether to keep going or stop and rethink. Take a minute there before any new part goes in.
- Score and remove the interior stops. Cut the paint and caulk line, then pry each stop off gently so it can be reused.
- Remove the lower sash. Lift it out and cut the cords so the weights drop into the pocket, or unhook the spring balances.
- Take out the parting bead and upper sash. Pry the thin bead from its groove, then free the upper sash and its cords.
- Inspect and prep the bare frame. Check the sill and jambs for rot and confirm the opening is square and plumb.
- Mount the clips and snap in the liners. Fasten clips about four inches from top and bottom, then press the vinyl liners on.
- Set the upper sash, then the lower. Engage each sash into the balances and slide it home.
- Reinstall the stops and test. Nail the stops back, then open, close, and lock to check the glide and seal.
The Quick Swap: Tilt-In Sashes
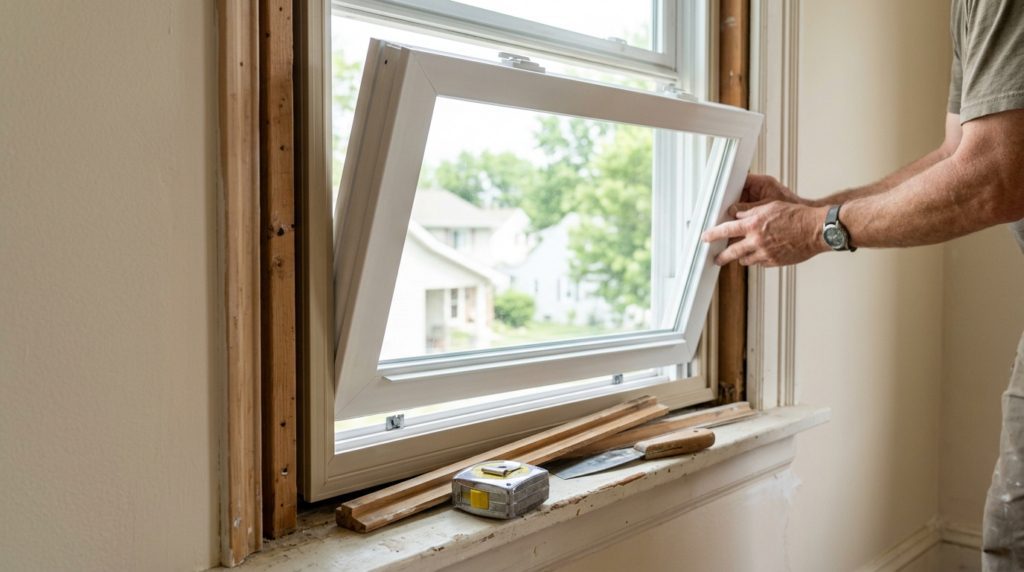
If your windows are from the last twenty years or so, the job may be far simpler than the full kit above. Most modern double-hung units are made to tilt in for cleaning, and that same feature lets you pull a sash without touching a single stop. Raise the lower sash a few inches, flip the two tilt latches at the top of the sash toward the center, and the panel pivots inward on its bottom corners.
From there, tilt the sash to roughly horizontal and look at the bottom corners, where two pins ride in the balance shoes inside the jamb liners. Press in or tip each corner to release the pins, and the sash lifts free. To fit the new one, reverse it: angle the sash in, seat both bottom pins into the shoes, swing it upright until the latches click, and run it up and down to confirm it stays put. A worn balance shoe is the usual reason a double-hung window sash drops or sticks, and many kits include fresh shoes for that reason.
The one trap is the balance shoe position. If a shoe has spun out of alignment while the sash was out, the pin will not catch and the new sash will slam down. A flat screwdriver turns the shoe back to vertical so the pin seats cleanly.
Older Columbus Windows: Weights, Cords, and What Changes
Plenty of homes around central Ohio still run on the original weight-and-cord system, where a hidden iron weight on a rope counterbalances each sash through a pulley in the jamb. These windows are worth keeping for their character, but a sash swap on them is a different animal than a tilt-in pop-out. You either rehang the new sash on the existing cords and weights, or you convert the opening to a modern spring-balance liner kit and retire the weights for good.
The conversion is the more common path now, because old cotton cords rot, knots slip, and the weight pockets leak air. Filling those empty pockets with low-expansion foam after the weights come out also cuts a surprising amount of draft. The trade-off is that a liner kit changes how the window looks and feels slightly, so on a historic block it is worth weighing against a faithful cord repair.
On older Columbus homes, the sash almost always rots at the bottom rail first, where rain sits and freeze-thaw works the moisture into the joint. The top of the same sash can look perfectly paintable from the street while the bottom is soft enough to push a thumb through.
Mistakes That Ruin a Sash Job
A sash swap is forgiving up to a point, but a few errors turn an afternoon job into a callback. Most of them happen at the start, before the new parts are even open, which is exactly when it is tempting to move fast. Run through this list first, because each item trades a little patience now for a window that seals and slides for years.
None of these are about strength. They are about measuring twice and not forcing a part that is telling you something is off.
- Ordering from one measurement, when a racked frame needs the narrowest of three widths.
- Cracking the stops on removal, by prying hard instead of scoring the caulk line first.
- Setting a new sash over a rotted sill, which lets the same water damage return within a season.
- Misaligning the balance shoes, so the sash will not catch and drops shut on its own.
- Skipping the weatherstrip and caulk, which leaves a tidy-looking window that still leaks air.
Not Sure If You Need a New Sash or a New Window?
If the glass fogs, the sash sticks, or cold air pours in no matter what you do, the fix could be a simple sash swap or a sign the frame itself is done. A quick look at the sill and jambs usually settles it, and guessing wrong is the costly part.
Book a free, no-pressure window assessment with our Columbus and Cincinnati team and get a straight answer on whether it is the sash, the glass, or the whole unit.
FAQ: Replacing a Window Sash

Ready to fix your windows? Get a free quote in 30 seconds.
Family-owned, licensed & insured. Free, no-obligation quotes.