A storm door looks like a simple add-on, but it is one of the easiest exterior projects to get wrong before you ever pick up a screwdriver. The whole job lives or dies on five minutes of measuring, and the number that trips people up is which surface to measure. Get that right and the door drops in and seals clean. Get it wrong and you are returning a door that is an inch too wide.
This guide walks through exactly where to put the tape, why you measure across the outer trim and not the door opening, how to pick the hinge side, and the small checks that decide whether a stock door fits or you need a custom one. If you are still shopping, our overview of entry and storm door options covers what mounts where.
Quick answer: Measure the width across the flat brickmould trim at the top, middle, and bottom, and the height from the sill to the header at the left, center, and right. Use the narrowest width and shortest height. Confirm at least one inch of flat mounting surface, then match a standard 32 or 36 inch door.
What You Need Before You Start
You do not need a tool bag for this, but you do need to write things down. A storm door opening is rarely a clean rectangle, especially on an older home, so you will end up with six numbers to compare, not two. Trusting your memory is how a 35 and three-quarter inch reading becomes 36 in your head, and that quarter inch is the difference between a clean fit and a fight.
The kit is short and almost certainly already in a kitchen drawer. Lay it out before you walk to the door so you are not measuring with one hand and texting the numbers with the other.
- A steel tape measure, long enough to span the full height in one pull without sagging.
- A pencil and a notepad, to record all three width and three height readings as you go.
- A small level or square, handy for checking whether the opening has gone out of square over the years.
Measure twice and order once. A storm door is cut to your numbers, so a misread does not get fixed at the store.
Measure the Width the Right Way
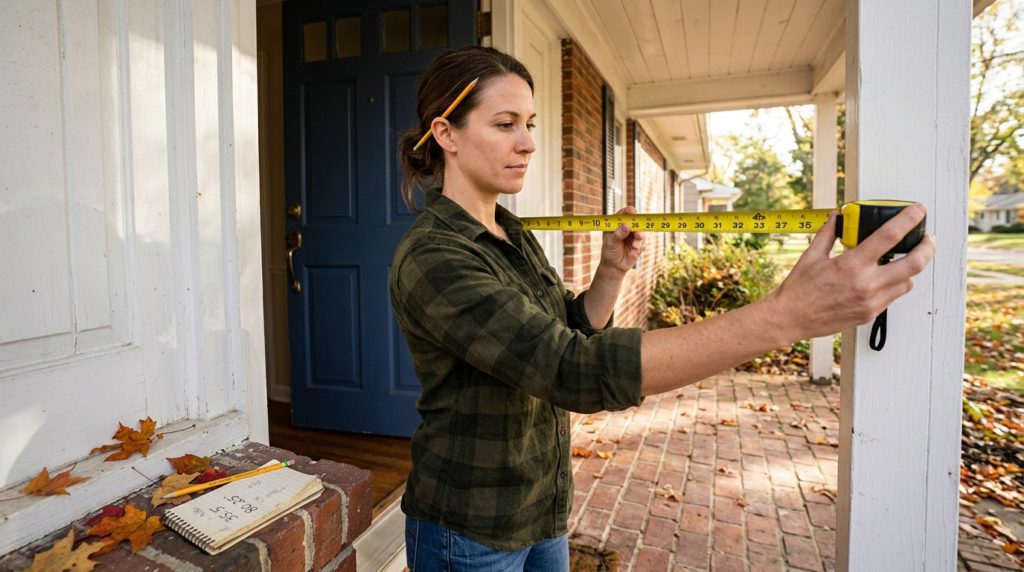
This is the step that decides everything, because most people measure the wrong opening. A storm door does not mount inside the door jamb where your entry door sits. It mounts on the flat exterior trim that frames the opening, the piece called brickmould. So you measure the width across the face of that trim, from the inside edge of the brickmould on one side to the inside edge on the other, where the door’s frame will actually land.
Take three width readings: one near the top, one across the middle, and one near the bottom. Houses settle, frames shift, and the opening you have today is almost never the perfect rectangle it was when it was built. The three numbers will usually differ by a little, and your storm door has to clear the tightest spot, so you write down and order to the narrowest of the three.
On older Columbus homes the bottom of an opening often measures wider than the top after decades of settling. We see people order to the easy middle number and then find the door binds at the header. Always take the narrowest reading, not the average.
Measure the Height from Threshold to Header
Height follows the same logic as width: measure where the door frame will actually sit, and take the shortest of several readings. Run the tape from the top of the sill or threshold straight up to the underside of the header, the flat trim across the top of the opening. Do this on the left side, the center, and the right side, because a threshold that has shifted or a header that has sagged will give you three different heights.
The threshold is the part to watch. Many sills are slightly sloped to shed water, so measure to the high point where the door frame meets the sill, not the low front edge. If you measure to the lowest point you will order a door that is too tall and end up cutting or shimming it to fit.
Record the shortest of your three height numbers. A storm door usually ships with an adjustable bottom sweep, called an expander, that closes a small gap at the sill, so a slightly short reading is forgiving. A reading that is too tall is not, because the frame simply will not slide into the opening.
Check the Mounting Surface and Trim
Before you trust your numbers, look at what the door will screw into. A storm door’s hinge rail and top rail need a flat, solid surface to mount on. The rule of thumb is at least one inch of flat trim on both sides and across the top, with a square ninety-degree corner where the trim meets the wall. If your brickmould gives you that, a standard door installs without drama.
Trouble shows up when the trim is decorative, rounded, or narrow. Ornate molding on a period home, a thin trim board, or brick that sits right up to the jamb leaves the rail nothing flat to bite into. The fix is shims, also sold as mounting strips, that build the surface out to a usable plane. You can read the depth now by laying a ruler flat against the trim and seeing how much square surface you really have.
This is also where Ohio weather earns a mention. Freeze-thaw cycles work moisture into the joint between trim and siding, and a soft, rotted brickmould will not hold a storm door no matter how perfectly you measured. Press a screwdriver into the trim at the bottom corners. If it sinks into punky wood, that trim gets repaired before the door goes on, not after.
How to Choose the Hinge Side
A storm door is handed, meaning it hinges on a specific side, so you decide that before you order. Stand outside facing the door. The hinges go on one side and the handle on the other, and the usual practice is to hinge the storm door on the same side as your entry door’s hinges. That way both doors swing the same direction and you are not reaching across one to open the other.
The bigger factor is what is in the way. Look at the full arc the door will swing through and pick the hinge side with the fewest obstructions. A porch column, a railing, a light fixture, a mailbox, a doorbell, or even a wall close to the opening can stop a door from opening fully or block the handle. Choosing the clear side now saves you from a door that only opens halfway.
If your layout is awkward, a universal or reversible door is worth knowing about. These ship so the hinge side can be set either way during installation, which gives you a fallback when the obvious side is blocked. The trade-off is a slightly more involved setup, covered in our walkthrough of installing a storm door step by step.
How to Measure for a Storm Door, Step by Step
With the reasoning out of the way, the actual routine is quick. Work top to bottom, write every number down as you take it, and resist the urge to round until you are comparing the readings at the end. The whole sequence takes about five minutes per door.
The one step nobody should skip is checking the mounting surface, because perfect width and height numbers mean nothing if the rail has nothing flat to grab.
- Gather your tools. A steel tape, a pencil, and a notepad to record every reading.
- Measure the width at three points. Across the flat brickmould at the top, middle, and bottom, not inside the jamb.
- Measure the height at three points. From the sill up to the header on the left, center, and right.
- Use the smallest readings. Order to the narrowest width and the shortest height.
- Check the mounting surface. Confirm at least one inch of flat trim on each side and across the top.
- Pick the hinge side. Match your entry door and swing clear of any obstruction.
- Compare to standard sizes. Match a stock door, or note that you need a custom or shimmed unit.
Standard Storm Door Sizes and When You Need Custom
Most exterior openings were framed to a handful of standard sizes, which is why off-the-shelf storm doors exist at all. The common widths are 32 and 36 inches, with 30 and 34 inch models available for narrower openings. Standard heights run around 80 to 81 inches, though some lines are built shorter near 75 inches for older or low openings. If your narrowest width and shortest height land on one of those, a stock door fits.
Numbers that fall between sizes, or an opening taller than the standard range, point you toward a custom door, which is built to your exact measurements and can run up to eight feet tall. Before you commit, it helps to know which style you actually want, since full-view, ventilating, and retractable-screen doors mount a little differently and suit different entries. Our guide to the main types of storm doors lays out which one fits which situation.
One Ohio-specific caution on glass: a full-view storm door over a dark entry door can trap a surprising amount of summer heat between the two, enough to stress the inner door’s finish. If your entry faces strong afternoon sun, a ventilating model that lets that heat escape is the safer pick.
Mistakes That Lead to a Door That Doesn't Fit
Almost every storm door return traces back to one of a few measuring slips, and all of them are easy to dodge once you know they exist. Run through this list before you order, because a custom or even a stock door is rarely worth the trip back.
None of these take extra time. They are about measuring the right surface and respecting the readings the opening gives you.
- Measuring the jamb instead of the brickmould, which gives a number too small because the door mounts on the outer trim.
- Taking a single measurement and missing the fact that the opening is out of square, then ordering to the wrong dimension.
- Using the average instead of the smallest reading, so the door binds at the tightest point of the opening.
- Ignoring the mounting surface, then discovering the trim is too narrow or rounded for the hinge rail.
- Forgetting to check the swing path, and hinging the door into a railing, a column, or the doorbell.
Not Sure Your Opening Is Standard?
If your readings fall between sizes, the trim looks too narrow to mount on, or you found soft wood at the corners, it is worth a second set of eyes before you order. An out-of-square or rotted opening is a common reason a perfectly measured door still will not seal, and it is a quick thing to check in person.
Book a free, no-pressure door measurement and assessment with our Columbus-area team and get the right size and the right fix the first time.
FAQ: Measuring for a Storm Door

Ready to fix your windows? Get a free quote in 30 seconds.
Family-owned, licensed & insured. Free, no-obligation quotes.