Over a decade of restoring windows in Columbus homes, from century-old Victorians to sleek modern builds, has shown that window screen replacement ranks high every spring. Alexander Kubai, window repair expert at Window Gurus, draws from guiding homeowners through this process to turn potential chores into straightforward improvements for airflow and insect barriers. This guide covers how to replace window screen, including DIY window screen replacement techniques, to achieve reliable results.
Why Replace Your Window Screen?
Inspect tears, holes, or sagging mesh to determine the best path forward.
Assessing Damage: When to Repair vs. Full Replacement
Minor problems suit patching, while extensive wear demands complete replacement to eliminate repeated issues and ensure long-term performance. Careful evaluation helps homeowners decide based on the extent of damage, considering factors like mesh integrity and frame condition to avoid future complications in varying weather scenarios.
Signs of Irreparable Tears or Wear
Examine rips exceeding a quarter’s size, frayed borders that snag on frames, or mesh that droops after attempts to tighten—these indicate lost tension and compromised bugproof seal. During work on a 1920s Columbus bungalow, the original fiberglass mesh shredded from bird impacts, allowing ants entry; repeated patches proved ineffective, leading to full replacement for sustained effectiveness. Additional indicators include discoloration from prolonged sun exposure or weakened areas that fail to hold shape, signaling the need for comprehensive renewal to restore full functionality.
Benefits of Timely Replacement for Pest Control and Ventilation
New screens halt even minuscule insects while preserving even airflow, minimizing energy waste from open windows. Residents report reduced indoor mosquitoes and improved cross-breezes, potentially cutting air conditioning demands by up to 10% in intense heat periods. Such updates also safeguard window frame durability, preventing wood decay from moisture accumulation. Moreover, timely replacements contribute to better indoor air quality by facilitating consistent ventilation, which is especially valuable in regions with fluctuating humidity levels like Ohio.

Tools and Materials Needed for Window Screen Replacement
Here are the key points to know about Tools and Materials Needed for Window Screen Replacement.
Essential Tools
Hand tools manage most tasks, rendering the process approachable for novices.
- Spline rollers (convex for pressing, concave for finishing)
- Utility knife for precise trimming
- Tape measure and straightedge for accurate sizing
- Flathead screwdriver for frame access and spline extraction
- Cutting board to protect surfaces during mesh preparation
Spline Rollers, Utility Knives, and Measuring Tools
Spline rollers insert the spline into frame grooves without mesh damage. A sharp utility knife removes excess material neatly, while tape measures guarantee exact dimensions. A screwdriver handles frame tabs effectively; neglecting a quality roller often results in uneven applications that develop wrinkles within months, as observed in numerous installations. These tools, when used properly, support precise work that aligns with professional standards, ensuring the screen fits snugly and performs reliably over time.
Types of Window Screen Materials
Select according to requirements: resilience against pets, affordability for routine applications, or tight weave against small insects. This section explores types of window screen material to inform choices. Understanding material properties aids in selecting options that match environmental demands, such as resistance to UV fading or flexibility for curved frames.
Fiberglass vs. Aluminum: Durability, Cost, and Installation Differences
Fiberglass vs aluminum window screen comparison reveals fiberglass offers flexibility, pricing at $0.50–$1 per square foot, and straightforward rolling for DIY efforts, though it may sag in windy conditions over time. Aluminum endures up to 15 years, withstands impacts at $1–$2 per square foot, but requires cautious cutting to manage sharp edges. In a pet-friendly Columbus townhouse project, aluminum gave way to fiberglass for simplified subsequent maintenance. Both materials provide distinct advantages in terms of weight and corrosion resistance, influencing choices for coastal or urban settings.
Best Options for Bug Resistance and Pet-Proofing
Fine-mesh fiberglass with an 18×16 weave blocks tiny bugs effectively, serving as the best window screen mesh for bugs in standard settings. Pet resistant window screen, such as vinyl-coated polyester, endures claw scratches without rips, repelling 99% of insects while maintaining taut surfaces in active households. These specialized meshes incorporate tighter grids and reinforced fibers to enhance barrier properties without compromising airflow efficiency.
Spline, Frame Components, and Sourcing Supplies
Spline, a rubber cord, anchors the mesh; select diameters from 0.125–0.250 inches to fit frame channels. Vinyl or foam variants available at hardware outlets provide durable options. Frames usually feature aluminum or plastic construction—check for distortions prior to acquiring replacements. These elements ensure secure, bugproof installations. Proper spline selection prevents slippage, while compatible frame parts maintain structural integrity across multiple seasons.

Understanding Window Screen Parts Before Starting
The frame provides the sturdy perimeter, typically featuring a U-channel groove.
Key Components: Frame, Mesh, and Spline Explained
Mesh covers the area for insect screening, and spline secures it under tension. Historic restorations often reveal wooden frames paired with metal splines—robust yet susceptible to rust without proper sealing. Each part plays a critical role in overall stability, with the groove depth influencing spline compatibility and mesh tension.
How Screens Assemble: Visual Breakdown for Beginners and Experts
Position the frame as foundation; overlay mesh, then embed spline along edges to generate tautness. This process stretches the mesh evenly, akin to securing canvas on a stretcher. Experts should consider adjustable tension springs in certain frames for seasonal adjustments—essential amid Ohio’s temperature fluctuations. This assembly method ensures balanced pressure distribution, reducing the likelihood of future sagging or gaps.
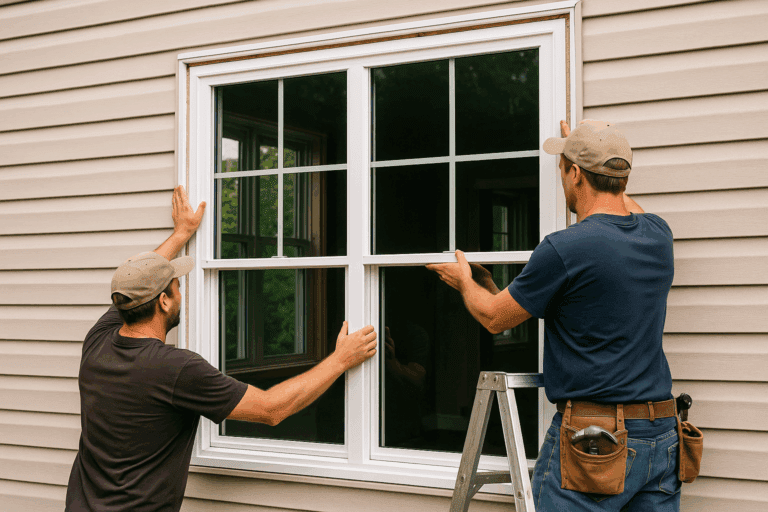
Step-by-Step Window Screen Replacement Tutorial
- Remove the old window screen frame from the window channel.
- Extract old window screen mesh and spline carefully.
- Measure and cut new window screen mesh with oversize allowance.
- Position mesh and roll in window screen spline evenly.
- Trim excess window screen and secure edges for smoothness.
- Reinstall the frame and verify operation.
Remove the Old Window Screen Frame from the Window
Release the frame delicately for inspection without marring surfaces. This covers window screen frame removal basics. Gentle handling preserves usability, especially for reusable frames in multi-pane setups.
Safe Removal Techniques to Avoid Frame Damage
Identify corner plungers or tabs, then depress while angling the frame outward—eschew metal prying tools that deform aluminum. For spline-secured types, elevate from the base. A soft cloth buffer preserved a client’s frame integrity in one case, averting $50 in additional fixes. Additional precautions include working in good lighting to spot subtle tabs and using padded supports to prevent accidental drops.
Remove Old Window Screen Mesh and Spline
Dislodge aged elements methodically to repurpose the frame, focusing on window screen spline replacement where needed. Thorough removal clears the way for new installations without residue interference.
Step-by-Step Extraction Without Bending the Frame
Employ a flathead screwdriver to engage and withdraw spline from a corner, progressing around the outline. Lift mesh as it releases, then brush the groove clean. Prevent frame torsion; for elevated windows, position a drop cloth underneath to collect debris. This methodical approach maintains groove cleanliness, essential for the new spline to seat properly and ensure a tight seal.
Cut and Prepare New Window Screen Mesh
Accuracy at this stage yields a polished outcome. Precise preparation sets the foundation for a durable screen that withstands daily use.
Accurate Measuring and Cutting with Extra Allowance for Tension
Gauge frame interior lengths, incorporating 2–4 inches oversize across all edges for adequate wrapping. Slice using a utility knife atop a cutting board with a straightedge for straight cuts. Cut new window screen works simplest with fiberglass; aluminum benefits from initial scoring to evade ragged borders. Accounting for material stretch during installation helps achieve optimal tension without excess waste.
Roll in Window Screen Spline and Install Mesh
Anchor mesh uniformly to attain a smooth, taut finish that keeps window screen smooth. Even installation promotes longevity by distributing stress evenly across the surface.
Stretching Techniques for Wrinkle-Free Fit
Align mesh centrally over the frame, initiating at one side: embed spline via convex roller into the groove, drawing mesh taut progressively. Alternate opposite sides to distribute tension evenly—target drum-like firmness minus rips. Consistent pressure application avoids bubbles or loose spots, common in rushed jobs.
Pre-Rolling Spline for Efficient Insertion
Soak vinyl spline in warm water to enhance pliability, then segment to frame side lengths. This method accelerates embedding by 20%, particularly for expansive screens, drawn from extensive practical applications. Pre-treatment also reduces breakage risk, ensuring smoother workflow for larger or irregularly shaped frames.
Trim Excess Window Screen and Ensure Smooth Edges
Conclude with tidy borders to eliminate hazards. Finishing touches enhance safety and aesthetics for seamless integration.
Cleanup Methods to Prevent Snags
After spline fully embeds, sever surplus mesh level with the roller using a utility knife at 45 degrees. Apply the concave roller along borders to nestle remnants, confirming no protruding fibers snag on window components. Trim excess window screen this way promotes durable, even results. Inspecting under light reveals any overlooked strands, preventing long-term wear from friction.
Reinstall the Window Screen Frame
Validate secure positioning. Final checks confirm compatibility with existing window mechanisms.
Testing Fit and Adjustments for Secure Placement
Insert frame into window track, inspecting uniform clearances. Modify plungers as required; cycle the window open and shut 10 times to affirm fluid motion. Binding indicates burrs from Ohio’s humidity—light sanding resolves these. Ongoing adjustments account for seasonal expansion, maintaining reliable operation year-round.

Window Screen Repair Tips for Common Issues
Address minor flaws to prolong screen utility by 1–2 years.
Fixing Damaged Areas Without Full Replacement
Localized fixes preserve resources while extending service life.
Patching Small Tears for Quick, Cost-Effective Solutions
Affix self-adhesive mesh over openings under 2 inches, applying firm pressure. Reinforce with clear vinyl tape from behind for added strength. Such a patch endured a summer storm in a client’s sunroom application. Matching patch material to the original ensures color consistency and seamless blending.
How to Fix a Torn Window Screen Quickly
Resolve rips promptly to sustain insect defense. Swift action prevents escalation to larger damages.
Tools and Methods for Temporary vs. Permanent Repairs
Temporary fixes involve duct tape spanning the tear. Permanent solutions entail slicing a slightly larger mesh patch and anchoring via spline in the channel. The roller tool suffices—no fresh frame necessary. Selecting adhesive-backed options simplifies application, ideal for non-structural tears in accessible locations.
Common Mistakes to Avoid During DIY Replacement
Evade pitfalls to sidestep rework. Awareness of errors fosters better outcomes on first attempts.
Overstretching Mesh or Selecting Wrong Material Size
Excessive pulling distorts mesh; opt for relaxed measurements to foster inherent tension. Inappropriate sizing, such as coarse weave against fine bugs, permits intrusion—align with specifics, including pet resistant window screen for scratch-vulnerable areas. Double-checking compatibility avoids mismatches that could compromise the entire setup’s effectiveness.
Maintenance Tips Post-Replacement
Sustain the upgrade’s performance. Routine care maximizes investment and prevents premature wear.
Seasonal Cleaning and Longevity Strategies
Vacuum screens monthly, cleanse with mild soap every quarter, and shelter indoors during winter. This regimen extends service to 10 years, confirmed through field evaluations of Columbus setups. Additional strategies include applying protective coatings to frames for rust prevention in humid climates.
Variations for Door, Patio, or Specialty Screens
Modify for scaled applications. Adaptations ensure suitability for high-traffic or unique installations.
Adjustments for Larger or Custom Frames
Doors demand robust spline to counter swinging forces. Patio variants require fortified corners; segment mesh cuts for pullout designs. Custom historic frames in Ohio farmhouses necessitate groove-compatible materials. Scaling up tools, like longer rollers, facilitates handling of oversized units without quality loss.

Cost of Window Screen Replacement: DIY Breakdown
Detail expenses for a typical 3×4-foot window screen.
Material and Tool Costs (U.S. and Ohio Estimates)
Regional pricing variations influence overall outlay.
Budget Breakdown: Fiberglass Kits vs. Premium Pet-Resistant Options
Fiberglass kits, encompassing mesh, spline, and optional tools, range $15–$25. Pet-resistant polyester variants cost $30–$50. Ohio retailers like Home Depot incur $5–$10 extra for taxes and transport. Homeowners achieve 70% savings versus professional estimates through this route. Bulk purchasing further reduces per-unit costs for comprehensive home updates.
Savings vs. Professional Service Comparison
DIY outlays span $20–$60 per screen; professionals bill $100–$200 with labor included — and homeowners comparing full window upkeep often estimate related work in a window repair cost calculator. If damaged screens coincide with drafts or perimeter gaps, combining screen replacement with professional window caulking and sealing improves overall performance. And when poor airflow or moisture behind a torn screen reveals fogging or seal failure in the glass unit, targeted foggy window repair for insulated glass or repair of a failed window seal restores clarity without replacing the entire window.
Troubleshooting Window Screen Issues and When to Call a Pro
Heat causes spline loosening; improper storage warps frames, creating gaps.
Frequent Problems: Loose Spline, Warped Frames, or Poor Fit
Environmental factors like temperature swings exacerbate these concerns.
DIY Fixes vs. Signs Needing Expert Intervention
Reinsert spline for slackness, or realign frames manually. Seek professionals for fractured aluminum or intricate custom assemblies—such cases benefit from specialized assessment in Columbus with warranties. Persistent reseating failures warrant on-site evaluation. Distinguishing between simple adjustments and structural issues prevents unnecessary expenses.

FAQs: Window Screen Replacement Guide

Ready to fix your windows? Get a free quote in 30 seconds.
Family-owned, licensed & insured. Most quotes delivered the same day.