Plexiglass takes paint well, but it does not behave like wood or canvas. The surface is slick, it builds static that pulls in dust, and it expands and contracts with temperature far more than glass does. Skip the prep or grab the wrong paint and the finish bubbles, peels, or cracks within a season. Done right, a painted acrylic panel stays crisp for years.
This guide covers the whole job: cleaning without crazing the plastic, sanding for grip, the paints that actually bond, reverse painting for a tougher surface, and the mistakes that send people back to square one. If the panel you want to paint is a clouded or scratched window, painting may only hide the problem, and a fresh pane from a glass and acrylic shop is the better call.
Quick answer: To paint plexiglass, clean it with a plastic-safe cleaner, scuff it lightly with 220 to 400 grit sandpaper, then mask and prime. Apply two or three thin coats of acrylic or plastic-bonding spray paint, letting each dry, and finish with a clear sealant. Let it cure a full day before handling.
Can You Actually Paint Plexiglass?
Yes, plexiglass accepts paint, as long as the paint is made to bond with plastic. Acrylic craft paint, plastic-bonding spray paint, and plastic enamels all stick well once the surface is prepped. Oil-based paints are the exception. They cure into a hard, brittle film that does not move with the sheet, so they crack and flake when the acrylic expands on a warm day.
The reason prep matters so much comes down to what plexiglass is. It is a smooth, non-porous sheet of acrylic plastic, the same material covered in our plain-language guide to plexiglass. Paint has nothing to grip on a glossy, sealed surface, which is why a clean scuff and a plastic primer do most of the work.
Decide whether you want the panel see-through or solid before you start. A coat of color turns a clear sheet opaque, so painting a window you still need to look through means masking a design or using a translucent tint rather than full coverage.
What You Need to Paint Plexiglass
Everything here is inexpensive and easy to find, but the grade matters. The cleaner has to be ammonia-free, the sandpaper has to be fine, and the paint and primer both need to say plastic on the label. Gather the kit below before you start so wet paint never has to wait while you hunt for a brush.
One tip from the workshop: buy a little more sandpaper and a couple of extra foam applicators than you think you need. The smooth surface wears both down faster than you expect.
- An ammonia-free cleaner or rubbing alcohol and a microfiber cloth to degrease the surface.
- Fine-grit sandpaper, 220 to 400 grit, to scuff the gloss for adhesion.
- Painter’s tape to mask clean edges and protect any clear areas.
- A plastic-bonding primer, in spray or brush form.
- Acrylic paint, plastic-safe spray paint, or plastic enamel for the color coats.
- A synthetic brush or foam roller, plus a clear plastic-safe sealant to finish.
Prep Is Where the Job Is Won or Lost
Preparation is where almost every failed plexiglass paint job goes wrong, so slow down here. Start by wiping the whole sheet with rubbing alcohol or an ammonia-free cleaner to lift grease, fingerprints, and dust. Never reach for a standard glass cleaner with ammonia in it. Ammonia can craze acrylic, leaving a web of fine cracks that no paint will hide.
Plexiglass also holds a static charge that drags dust back onto the surface the moment you wipe it clean. Work in a low-dust room, wipe with a slightly damp microfiber cloth to bleed off the static, and paint soon after cleaning rather than letting the sheet sit and collect grit again.
Next, scuff the area lightly with 220 to 400 grit sandpaper until the shine turns to an even, dull haze. That micro-texture is what the primer grabs. Wipe away the sanding dust, mask off any edges or clear zones with painter’s tape, then lay down a thin coat of plastic-bonding primer and let it dry fully, usually about an hour.
How to Paint Plexiglass, Step by Step
With the panel cleaned, scuffed, and primed, the painting itself is quick and forgiving as long as you keep every coat thin. Thick paint is the enemy on a slick sheet. It runs, traps bubbles, and cures unevenly. Build the color in layers instead, and let each one set before the next.
The single rule that saves most jobs is patience between coats. Acrylic needs a couple of hours and spray paint far less, but rushing either one is what causes a wrinkled or peeling finish.
- Clean the surface. Wipe with rubbing alcohol or an ammonia-free cleaner and dry with microfiber.
- Scuff it lightly. Sand with 220 to 400 grit until the gloss turns to an even haze.
- Mask and prime. Tape off clear areas, then apply a thin coat of plastic-bonding primer and let it dry about an hour.
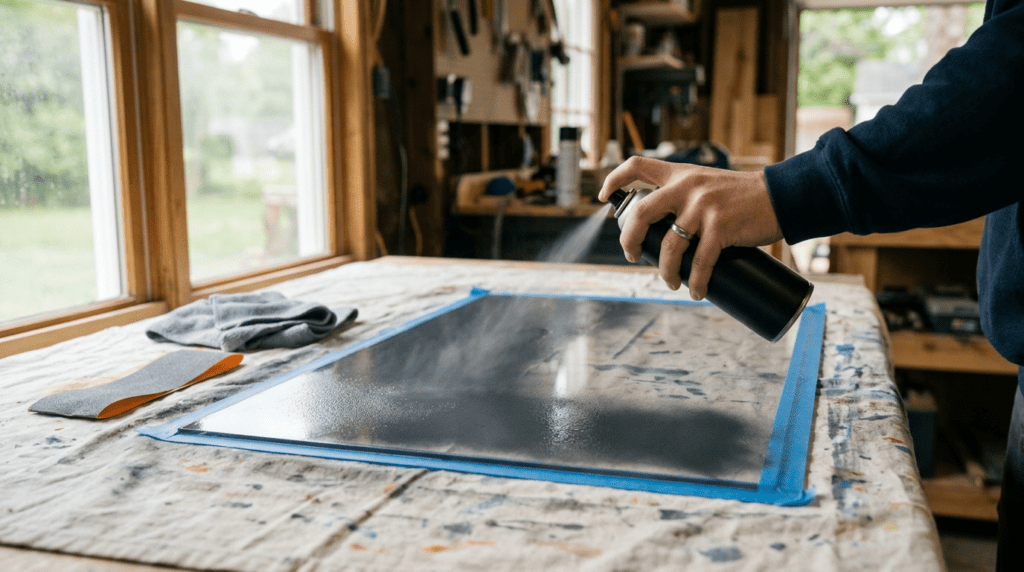
- Apply a thin first coat. Brush in even strokes or spray in short passes from eight to twelve inches away.
- Let it dry. Give acrylic one to two hours and spray paint ten to thirty minutes.
- Add more coats. Build two to three thin layers for solid color.
- Seal and cure. Finish with a clear plastic-safe sealant and wait a full day before handling.
Spray or Brush: Which Works Better
Both brush and spray give good results on plexiglass, and the right choice depends on the look you want and the size of the panel. Spray paint is the easier path to a smooth, glass-like finish across a large sheet, since there are no brush marks to level out. The trade-off is overspray and the need for good ventilation, because the fumes are strong.
Brushwork gives you more control for bold shapes, lettering, and reverse-painted designs, and it wastes less paint on small projects. Use a quality synthetic brush or a foam applicator and resist the urge to overwork the paint. Acrylic starts to grab within a minute, and brushing back over a setting coat is what leaves drag marks.
Whichever you pick, thin coats win. A spray can held too close or a brush loaded too heavy both end the same way, with runs and bubbles you have to sand back and redo.
Reverse Painting for a Tougher Finish
Reverse painting means coating the back of a clear acrylic sheet so you view the color through the glossy front face. It is a favorite for signs, tabletops, and decorative panels because the plastic itself protects the paint from scratches and handling, and the finished surface looks deep and glassy.
The method flips the usual order. Any lettering or layered design has to go on back to front, with details and outlines first and the background color last, since the first thing you paint is what shows through most clearly. It takes a little planning, but the durability is worth it on anything that gets touched often.
Reverse painting also suits acrylic glazing used in place of glass, like the panels covered in our look at plexiglass windows. Putting the color on the protected interior face keeps weather and cleaning off the paint film.
Painting Plexiglass That Lives Outdoors
Paint that survives indoors can fail fast outside, and the reason is movement. Acrylic expands and contracts with temperature far more than glass, and an Ohio panel can swing from a frozen winter morning to a sun-baked afternoon. A rigid paint film that cannot flex with that movement eventually crazes and flakes, especially along edges and corners.
Two habits make outdoor work last. First, paint at moderate room temperature, not in an unheated garage in January. Most paints and sealants will not cure properly in the cold, and a half-cured film peels within weeks. Second, lean toward flexible, plastic-bonding paints and always seal the surface, because the sealant takes the brunt of the sun and rain.
On exterior acrylic panels around Columbus, the paint that lifts first is almost always the coat someone rushed in a cold garage. Give it warmth and a full cure and the same paint holds for years.
Mistakes That Make the Paint Peel
Plexiglass is forgiving once you know its quirks, but a handful of shortcuts cause nearly every peeling, bubbling, or cracked finish. Read this list before you open a can, because each item trades a few minutes now for a redo later.
None of these take extra skill. They are about the right product, a clean surface, and the patience to let paint cure.
- Cleaning with an ammonia glass cleaner, which can craze the acrylic into fine cracks.
- Skipping the sanding and primer, so paint never grips the glossy surface and peels in sheets.
- Using oil-based paint, which dries too rigid and cracks when the sheet expands.
- Laying on thick coats, the cause of runs, bubbles, and uneven curing.
- Handling before full cure, which smudges the design and lifts the edges.
- Forgetting the sealant, leaving the paint open to scratches, fading, and weather.
When to Paint Versus Replace the Panel
Painting is the right move for a craft, a sign, or a decorative panel. It is the wrong move for a window or storm-door pane you are trying to rescue. If a plexiglass pane has gone cloudy, yellowed, or deeply scratched, a coat of paint only buries the damage and kills any light it still lets through.
For light surface scuffs, polishing usually beats painting, and our guide on removing scratches from plexiglass walks through that. When the panel is fogged or too far gone to clear up, replacing the acrylic is cleaner and cheaper in the long run than fighting it. A glazing shop can cut a new sheet to size in clear or tinted stock.
The same logic applies to old glass that has failed. If you are eyeing paint as a fix for a damaged pane rather than a decorative project, it is worth a quick second opinion before you commit the time.
Repaint, Polish, or Replace?
If the plexiglass you wanted to paint is really a foggy, cracked, or scratched window pane, paint will not bring it back, and patching it rarely lasts. A new pane cut to fit is the lasting fix, and it keeps the light and clarity a painted-over panel loses.
Tell us what you are working with and get a straight answer. Book a free, no-pressure glass assessment with our Columbus and Cincinnati team, and we will tell you whether to paint, polish, or replace.
FAQ: Painting Plexiglass

Ready to fix your windows? Get a free quote in 30 seconds.
Family-owned, licensed & insured. Free, no-obligation quotes.