A scratch on a window catches the light at exactly the wrong angle and pulls your eye every time you walk past. The frustrating part is that some scratches buff right out in an afternoon, while others will never come back no matter how hard you work, and the two look almost identical until you test them. Knowing which one you have saves a lot of wasted effort and keeps you from making a small mark worse.
This guide covers the fingernail test that tells you whether a scratch is fixable, the cerium oxide polishing method that pros actually rely on, the gentle kitchen fixes for very fine marks, and the common tricks that quietly damage the glass. It also explains when a scratch is a job for glass repair rather than a rag and some paste.
Quick answer: For light scratches you can see but barely feel, polish the glass with a cerium oxide compound on a damp felt pad, buffing in slow circles while keeping the area wet. Plain toothpaste handles very fine marks. If a fingernail catches the scratch, it is too deep to polish and the pane needs replacing.
First, Figure Out How Deep the Scratch Is
Before you reach for any product, find out what you are dealing with, because depth decides everything. Clean the glass, dry it, then run a fingernail slowly across the scratch. If your nail glides over it with no catch, the mark sits on the surface and there is a good chance you can polish it away. If the nail snags in the groove, the scratch is deep enough that polishing will only blur the area around it, not remove the line.
It also helps to know what kind of glass you have, since not every pane responds the same way. Ordinary annealed glass in an older single pane is the most forgiving. Tempered safety glass and the thin Low-E coatings on modern energy-efficient windows are far less so, and aggressive polishing can ruin a coating you cannot see. A quick way to confirm is our guide on how to tell if glass is tempered before you touch it with anything abrasive.
One more check worth a minute: make sure it is even a scratch. On Columbus homes with hard water, what looks like fine scratching is often mineral haze or a film that wipes off with the right cleaner. A little streak-free glass cleaning first can make a phantom scratch disappear entirely.
What You Need to Polish Out a Scratch
The reliable method uses a true glass polishing compound, not whatever is under the sink, so gather the right kit before you start. The active ingredient that does the work is cerium oxide, a fine powder that gently abrades and re-polishes the glass surface rather than just filling the line. You can buy it as a loose powder to mix with water or as a ready-made paste in a glass scratch kit.
The rest of the kit keeps the job controlled and the glass cool, which matters more than muscle. Light, patient pressure beats hard scrubbing every time, and the supplies below cost little next to a new pane.
- Cerium oxide powder or a glass polishing compound as the working abrasive.
- A felt or wool buffing pad for hand work, or a drill with a felt wheel on its lowest speed.
- A spray bottle of water to keep the area wet so the glass never overheats.
- Soft microfiber cloths for cleaning before and wiping haze after.
- A grease pencil or tape to mark the scratch, since wet glass makes it vanish while you work.
How to Remove Light Scratches with Cerium Oxide
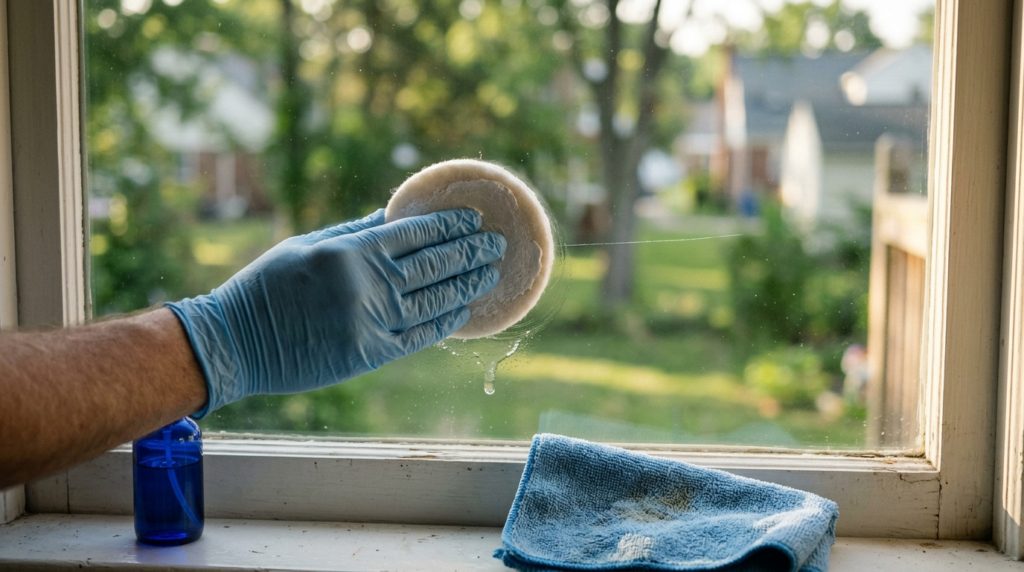
This is the method that actually restores the glass instead of hiding the damage, and the whole trick is going slow and keeping the surface wet. Heat is the enemy: dry friction from a fast buffer can build enough warmth to stress the pane, so re-wet the spot constantly and never let the pad ride dry. Mark the scratch first with tape or a grease pencil, because a wet, polished area hides the line until it dries.
Work in short cycles and check your progress in raking light rather than buffing blindly for ten minutes. A faint scratch may clear in a few passes; a slightly deeper one can take several rounds, and some never fully vanish, only soften. Stop the moment the glass stops improving rather than chasing a perfect result and overheating the pane.
- Clean and dry the glass so no grit drags under the pad and cuts new scratches.
- Test the depth with a fingernail; if it catches, stop here and plan to replace the glass.
- Mix the cerium oxide with a little water into a runny paste, or use a ready-made compound.
- Load a damp felt pad and dab the paste over the scratch and a small margin around it.
- Buff in slow circles with light pressure, by hand or a drill on its lowest setting.
- Keep it wet and cool by misting the area every minute so the glass never heats up.
- Wipe and inspect in raking light, then repeat the cycle until the mark fades or stops improving.
Quick Kitchen Fixes for Very Fine Marks
Not every scratch needs a compound and a drill. For the faintest hairline marks, a couple of mild household options can take the edge off, and they are worth trying first on a small spot since they cost nothing. Plain white toothpaste, the basic paste kind rather than a gel, contains a gentle abrasive. Put a little on a damp microfiber cloth and rub the scratch in small circles for twenty or thirty seconds, then wipe clean and check. A baking soda and water paste works on the same principle.
These mild fixes only touch the shallowest marks, so set your expectations and stop if you see no change after a couple of rounds. Pushing harder does not make them work; it just risks dulling the surrounding glass with fine swirl marks.
Clear nail polish belongs in a different category, because it hides rather than removes. Brushed thinly into a scratch and wiped flush with remover, it fills the groove and dries clear, which can make a stubborn line far less visible on glass you are not ready to replace. It is a cosmetic patch, not a repair, but on an out-of-the-way pane it buys time.
Methods That Do More Harm Than Good
The fastest way to turn one annoying scratch into a hazy, ruined pane is to grab the wrong tool, and a few popular shortcuts are exactly that. Run through this list before you start, because each item trades a quick fix for damage that polishing cannot undo.
None of these are about working harder. They are about respecting how thin and heat-sensitive glass really is.
- Heavy-grit sandpaper or a razor blade on the scratch, which carves wider gouges and can scatter a network of fine new ones.
- A high-speed buffer run dry, which builds heat fast and can stress or even crack the pane.
- Coarse steel wool or scouring pads, which leave a cloud of micro-scratches worse than the original mark.
- Polishing a Low-E or tinted coating, which strips the invisible film that makes the window energy efficient.
- Pressing harder when nothing happens, which usually means the scratch is too deep and the glass needs replacing, not more force.
Why Coated and Tempered Glass Is Different
Modern windows are rarely the simple float glass your grandparents had, and that changes the rules. Most energy-efficient panes carry a microscopically thin Low-E coating that controls heat, and it usually sits on a surface inside the sealed unit where you cannot reach it. When a coating is on an exposed face, though, any abrasive polish will scrub it away, leaving a clear patch that performs differently from the glass around it. If the window is coated, treat a scratch as a cosmetic call, not a polishing project.
Tempered safety glass adds its own caution. It is toughened by surface compression, and that strength comes from a skin you do not want to grind into. A deep scratch on a tempered pane is more than ugly: it can become the weak point where the whole sheet later lets go. Tempered glass also cannot be cut or reworked after the fact, as our guide on cutting tempered glass explains, so there is no shaving the surface down to chase a scratch.
On Columbus service calls, a lot of what people call scratches on the storm door or a low bathroom window turn out to be drag marks from an ice scraper or a gritty squeegee in winter. Half of them polish out, but the ones on coated or tempered glass we leave alone and price as a swap, because grinding the surface does more damage than the original mark.
When a Scratch Means Replacing the Glass
Some scratches are simply past saving, and recognizing one early keeps you from spending an afternoon making it worse. If a fingernail catches in the groove, if the scratch sits dead center in your line of sight, or if it is part of a deep gouge rather than a surface line, polishing will not bring it back. Trying anyway tends to leave a soft, distorted halo around the scratch that is more distracting than the original.
Depth matters for more than looks in this climate. A deep scratch concentrates stress along its line, and through the freeze-thaw swings of an Ohio winter, a large or sun-facing pane flexes as it heats and cools. That stress can turn a deep scratch into a crack origin months later, especially on tempered or insulated units. A scratch that compromises a sealed double-pane unit is also a glass problem, not a polishing one.
When replacement is the smarter call, it is often just the glass, not the whole window, that needs swapping, which keeps the job small. A technician can confirm whether the pane is repairable or due for new glass or a new unit, and tell you in a minute what would take you an afternoon to learn the hard way.
Not Sure If It Polishes Out or Needs Replacing?
If you have run the fingernail test and you are still unsure whether a scratch will buff out or the pane needs swapping, a quick look from someone who does it every day settles it. There is no sense risking a coated or tempered window on a guess.
Book a free, no-pressure glass assessment with our Columbus and Cincinnati team and get a straight answer on whether it is a simple polish or a glass replacement.
FAQ: Removing Scratches from Glass

Ready to fix your windows? Get a free quote in 30 seconds.
Family-owned, licensed & insured. Free, no-obligation quotes.