A window that looks straight into a neighbor’s kitchen or a bathroom at sidewalk level does not need a curtain or a whole new sash to fix. Frosting the glass scatters the light so shapes blur out while the daylight still pours through, and most methods cost less than a set of blinds and go up in an afternoon.
The catch is that not every method suits every window. Some peel off when you move out, some are permanent, and one of them can crack a cold pane if you rush it. This guide walks through the four DIY ways to frost a window, what each costs you in effort and permanence, and the climate trap that ruins more film jobs in Ohio than bad technique does. If your real problem is a pane that already looks cloudy, that is a glass and seal issue, not a privacy one, and frosting will not help.
Quick answer: To frost glass windows for privacy, clean the pane, then apply frosted window film, frosted spray paint, contact paper, or etching cream to the inside surface. Film is the most renter-friendly and removable; etching cream is permanent. Clean glass and even application matter more than the product you pick.
Pick Your Method: Temporary or Permanent
Before you buy anything, settle one question: do you want this to come off later or not? That single choice rules out half the options and saves you from a decision you cannot undo on a rented apartment or a window you might restyle in a year.
There are four realistic DIY routes, and they line up on a scale from fully reversible to forever. Static-cling and adhesive films sit at the easy, removable end, which makes them the right call for renters and for anyone testing a look. Frosted spray paint and contact paper land in the middle: both come off with some work, paint with acetone and paper with a soak and a scrape. Etching cream is the permanent one, because it chemically eats the surface of the glass and there is no taking it back.
Opacity is the other variable people forget. A single coat of spray or a light film blurs shapes but still passes a fair amount of light, while a heavier etch or a dense film reads almost solid. Decide how much you want to see daylight versus hide the room, then match the method to it rather than guessing at the store.
What You Need to Frost a Window
The shopping list is short and most of it is already under your sink. What you actually buy depends on the method, but the prep tools overlap, so gather the basics first and add the one product for your chosen route.
Whatever you pick, the glass has to be spotless before you start, because dust, grease, and old cleaner residue are what cause film to lift and spray to go blotchy. Set out a clean workspace, open a window for air if you are spraying or etching, and keep a dry cloth in reach.
- Glass cleaner or a vinegar-water mix and a lint-free cloth for a streak-free surface.
- Frosted window film plus a spray bottle, dish soap, a squeegee, and a sharp utility knife for the film method.
- Painter’s tape to mask the frame and any glass you want left clear.
- Frosted glass spray paint and a drop cloth if you are spraying.
- Etching cream, a foam brush, and chemical-resistant gloves and goggles for the permanent route.
- A tape measure and a straightedge so your cuts are clean and square.
How to Frost a Window with Film, Step by Step
Frosted film is the method most people should start with. It is removable, gives off no fumes, holds up far longer than paint, and a beginner can get a clean result on the first try. The whole job on a standard pane takes well under an hour once the glass is clean.
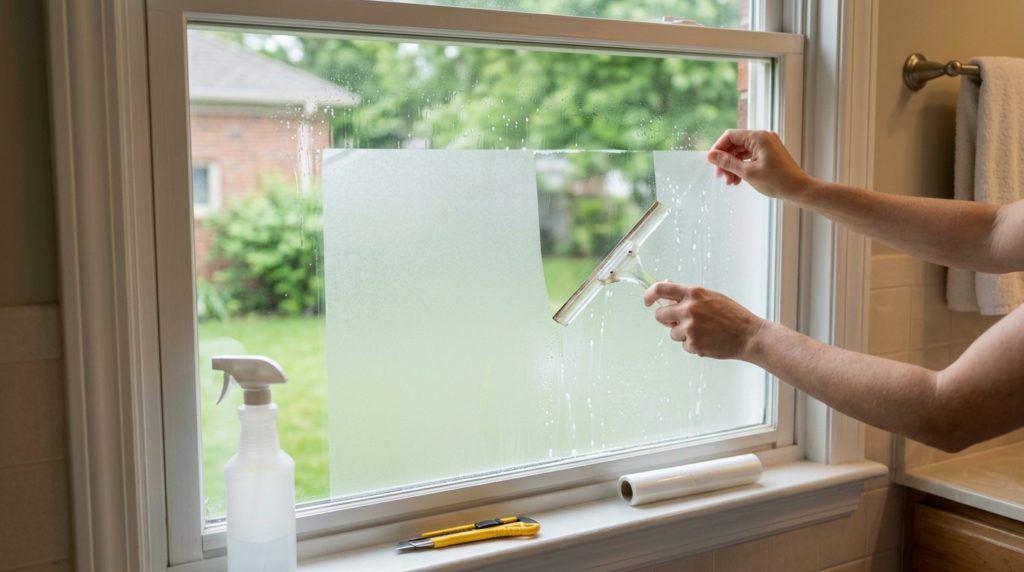
The trick that separates a smooth job from a bubbled mess is water. You apply the film to a wet pane, not a dry one, so it floats into position and lets you squeegee the air out before it grabs. Work top to bottom and do not rush the trimming.
- Clean the glass. Wash with glass cleaner or a vinegar-water mix and dry with a lint-free cloth so nothing sits under the film.
- Measure and cut the film. Cut it about an inch larger on every side so you can trim it flush later.
- Wet the glass. Mist the pane with water and a couple of drops of dish soap so the film can slide.
- Peel and apply. Peel the backing and lay the film on from the top down, smoothing as you go.
- Squeegee the bubbles. Work from the center outward to push water and air to the edges.
- Trim the edges. Run a sharp utility knife along the frame, leaving a hair’s-width gap from the edge.
- Final squeegee and dry. Smooth once more, wipe the border, and let it set before cleaning it.
Frosting with Spray Paint
Frosted glass spray, sold by brands like Rust-Oleum, is the cheapest way to cover an oddly shaped pane or a small window where cutting film is fiddly. It also works on glass cabinet doors and sidelights where a straight film edge is hard to manage. The look is good when you get it even, and that is the whole challenge.
Clean the glass, mask the frame and any area you want left clear with painter’s tape, then spray. The rule is thin coats: a light pass, full drying time, another light pass, repeated until the opacity looks right. Heavy single coats run and drip, and a glass-shop pro will tell you the hardest part of spray frosting is getting a uniform finish with no streaks or thin spots.
Two cautions. Spray frosting goes on the interior surface only, since weather strips it fast outside, and the finish scratches more easily than film, so it suits low-traffic glass over a busy bathroom window. If you change your mind, acetone or lacquer thinner takes it off.
Etching Cream for a Permanent Frost
Etching cream, such as Armour Etch, gives the closest thing to true factory frosted glass because it does not coat the surface, it eats into it. The frost becomes part of the glass, so it never peels, scratches off, or clouds, and it cleans like any other window. That permanence is also the reason to be sure before you start.
The cream is a strong acid compound, and it deserves respect. Wear chemical-resistant gloves and goggles, work in a ventilated room, and keep it off skin, frames, and anything you do not want etched. Mask the frame with painter’s tape, brush a thick, even layer of cream onto the glass, let it sit for the time on the label, then rinse it off with plenty of warm water.
Because there is no undo, etching is best for glass you own and plan to keep frosted for good, like a permanent bathroom window or a fixed transom. Use stencils if you want a pattern rather than a full frost. For a removable result, or on a rental, choose film or spray instead.
Budget and Decorative Options
If you want privacy for the price of a coffee, two low-cost tricks work surprisingly well. The first is repositionable contact paper or shelf liner with a frosted or patterned finish, applied to a wet pane the same way as film. It is not made for windows, so the edges can lift over time, but for a small bathroom or a basement window it is a fast, cheap fix.
The second is the classic cornstarch-and-fabric method. Mix a tablespoon of cornstarch into warm water, brush it onto the glass, and press on lace or a thin patterned fabric. As it dries the starch holds the fabric to the glass, giving a soft, decorative frost that peels off cleanly when you want a change. It is the most renter-proof option there is.
At the high-tech end sit switchable smart films that flip from clear to opaque with a switch, but those need wiring and usually professional install, so they fall outside a true DIY afternoon. For most homes, the choice is really film, spray, etch, or one of these budget tricks.
Mistakes That Ruin a Frosting Job
Frosting a window is forgiving, but a handful of shortcuts cause nearly every failed result we hear about. None of them take extra skill to avoid, just a little patience and the right surface.
Run through this list before you open the package, because most of these problems show up days later as peeling corners, blotchy patches, or a cracked pane that costs far more than the film did.
- Skipping the deep clean, which leaves grease and dust that stop film and spray from bonding.
- Applying film to a dry pane, so it grabs crooked and traps bubbles you cannot work out.
- Spraying or etching outdoors, when both belong on the interior surface, away from weather.
- Laying heavy coats of spray, which run and drip instead of building an even frost in thin passes.
- Cleaning frosted film with ammonia, which clouds and degrades it; use mild soap and water instead.
- Frosting over a pane that is already foggy, since the cloudiness is inside the glass, not on the surface you are treating.
Frosting and Ohio's Cold, Damp Windows
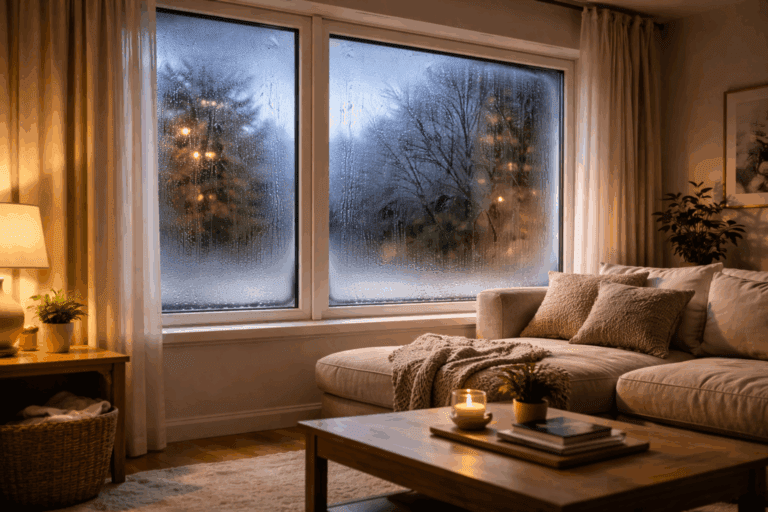
Here is the part the national how-to guides leave out, and it is the one that matters most in central Ohio. Frosted film goes on the warm inside face of the glass, and on a single-pane or an older drafty window, that inside face runs cold all winter. Warm, humid room air hits that cold surface, condenses, and the moisture has nowhere to go because the film is now sitting on top of it.
That trapped condensation is what lifts film edges, breeds mildew along the bottom rail, and turns a tidy job ugly by February. The fix is not a better film, it is a warmer, better-sealed window. A bathroom is the worst offender, since it is both the room you most want frosted and the room that makes the most steam, so run the vent fan and expect to re-press the edges after a hard cold snap.
On older Columbus homes we often see a homeowner film over a window that fogs in winter, hoping to hide the haze. The film cannot help, because the fog is condensation on cold glass, and within a season the moisture has worked under the edges and started peeling it. Warm the glass first, frost it second.
When the Glass Is the Problem, Not the Privacy
There is one situation where no amount of frosting will do what you want: a double-pane window that has already gone cloudy on its own. That milky haze is not on the surface, it is moisture sealed between the two panes after the unit’s seal failed, and film or spray laid over the outside of it does nothing for the look. The cure is to restore the sealed unit, which a foggy double-pane repair handles without replacing the whole window.
It is also worth knowing the permanent alternative to DIY frosting before you commit. Glass can be ordered with privacy built in from the factory, either as patterned or obscure privacy glass or as textured styles like rain glass, which blur the view without any coating to peel or scratch. For a bathroom or front-door sidelight you plan to keep private forever, factory glass outlasts any film.
One more reality check on DIY frosting: it hides shapes, not light. At night, with a lamp on inside, a frosted pane still shows a soft silhouette to anyone outside. If full nighttime privacy is the goal, pair the frost with a blind or curtain for after dark, or step up to a denser obscure glass.
Want Privacy Without the Peeling?
If the window you want frosted is also drafty, foggy, or sweating every winter, a film is a patch over a deeper problem, and it will keep lifting until the glass itself is fixed. Built-in privacy glass and a properly sealed unit solve both at once and never need redoing.
Book a free, no-pressure window and glass assessment with our Columbus-area team and get a straight answer on whether a quick DIY frost is enough or whether the glass needs attention first.
FAQ: Frosting Glass Windows for Privacy

Ready to fix your windows? Get a free quote in 30 seconds.
Family-owned, licensed & insured. Free, no-obligation quotes.